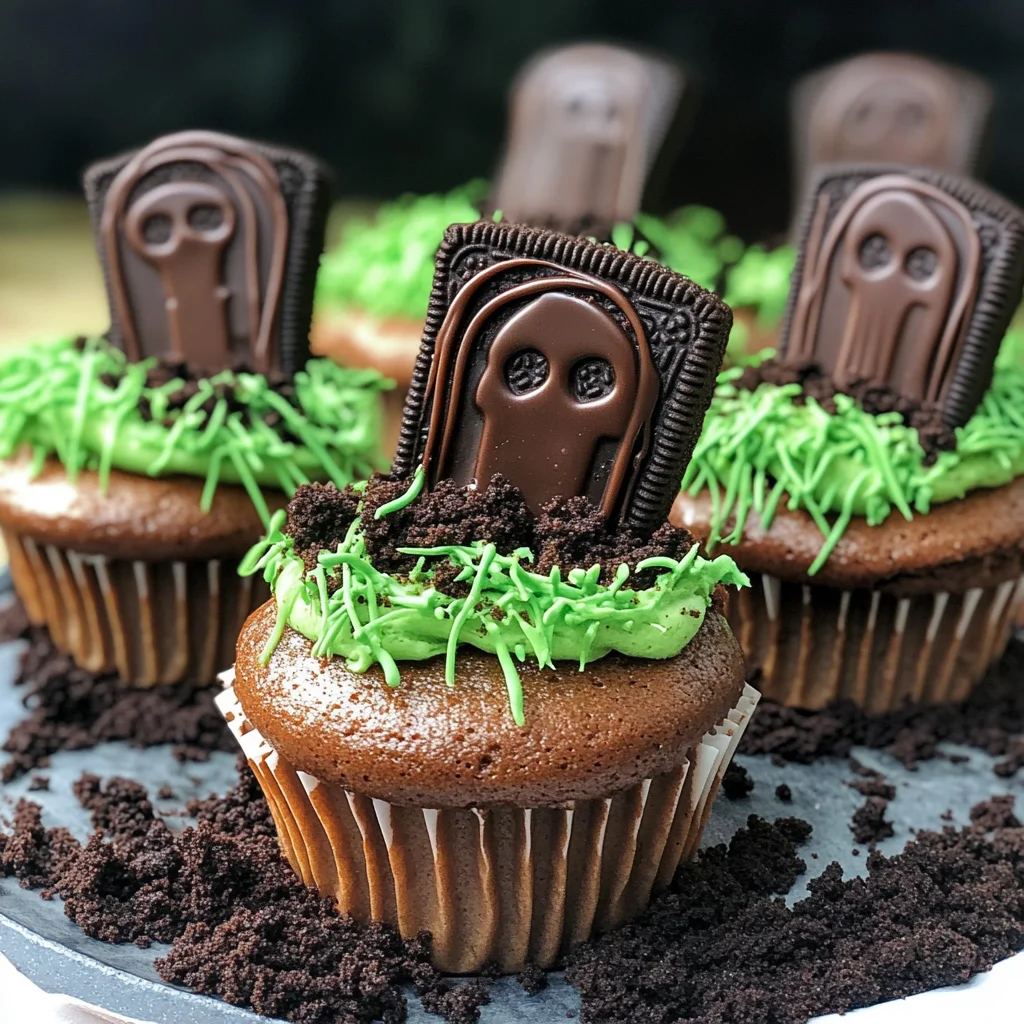
Halloween Graveyard Cupcakes are a delightful treat that combines the fun of spooky decor with delicious flavors. These cupcakes not only look impressive but also feature a rich Oreo cheesecake filling, making them perfect for Halloween parties or any festive gathering. The unique combination of chocolate, cream cheese, and crunchy biscuits creates a memorable dessert that will impress your guests and satisfy your sweet tooth.
Jump to:
- Why You’ll Love This Recipe
- Tools and Preparation
- Essential Tools and Equipment
- Importance of Each Tool
- Ingredients
- For the Cupcakes
- For the Oreo Cheesecake Filling
- For the Chocolate Buttercream
- For the Green Grass Buttercream
- How to Make Halloween Graveyard Cupcakes
- Step 1: Make the Biscuit Graves
- Step 2: Decorate with White Chocolate
- Step 3: Preheat Your Oven
- Step 4: Prepare the Sponge Mixture
- Step 5: Add Eggs and Milk
- Step 6: Fold in Dry Ingredients
- Step 7: Fill Cupcake Cases
- Step 8: Bake
- Step 9: Make Oreo Cheesecake Filling
- Step 10: Core Each Cupcake
- Step 11: Fill with Cheesecake
- Step 12: Prepare Chocolate Buttercream
- Step 13: Prepare Green Grass Buttercream
- Step 14: Pipe Chocolate Buttercream
- Step 15: Insert Biscuit Gravestones
- Step 16: Sprinkle Oreo Soil
- Step 17: Add Grass Details
- Step 18: Store Properly
- How to Serve Halloween Graveyard Cupcakes
- Spooky Platter
- Individual Treat Bags
- Halloween Party Table
- Themed Drink Pairing
- Kids’ Halloween Treats Station
- Ghoulish Garnishes
- How to Perfect Halloween Graveyard Cupcakes
- Best Side Dishes for Halloween Graveyard Cupcakes
- Common Mistakes to Avoid
- Storage & Reheating Instructions
- Refrigerator Storage
- Freezing Halloween Graveyard Cupcakes
- Reheating Halloween Graveyard Cupcakes
- Frequently Asked Questions
- Can I make Halloween Graveyard Cupcakes ahead of time?
- What can I substitute for dark chocolate?
- How do I achieve the best green grass buttercream?
- Can I use gluten-free flour for these cupcakes?
- Are Halloween Graveyard Cupcakes customizable?
- Final Thoughts
- 📖 Recipe Card
Why You’ll Love This Recipe
- Visually Stunning: The graveyard theme makes these cupcakes a showstopper at any Halloween celebration.
- Decadent Flavor: Rich chocolate cupcakes filled with Oreo cheesecake provide a delightful taste experience.
- Fun to Decorate: Kids and adults alike will enjoy creating their own spooky designs on these treats.
- Versatile Serving Options: Perfect for Halloween parties, school events, or as a fun surprise for family gatherings.
- Easy to Make: With straightforward steps, even novice bakers can whip up these delicious cupcakes.
Tools and Preparation
Before diving into making your Halloween Graveyard Cupcakes, ensure you have the right tools on hand. Having the necessary equipment will streamline your baking process and help achieve the best results.
Essential Tools and Equipment
- Electric whisk or stand mixer
- Cupcake tin
- Cupcake cases
- Piping bags
- Palette knife
- Baking paper
Importance of Each Tool
- Electric whisk or stand mixer: Saves time and ensures ingredients are mixed thoroughly for fluffy cupcakes.
- Cupcake tin: Provides uniform shape and size for each cupcake, making presentation easier.
- Piping bags: Allows for precise decorating—essential for creating those spooky grass details!
Ingredients
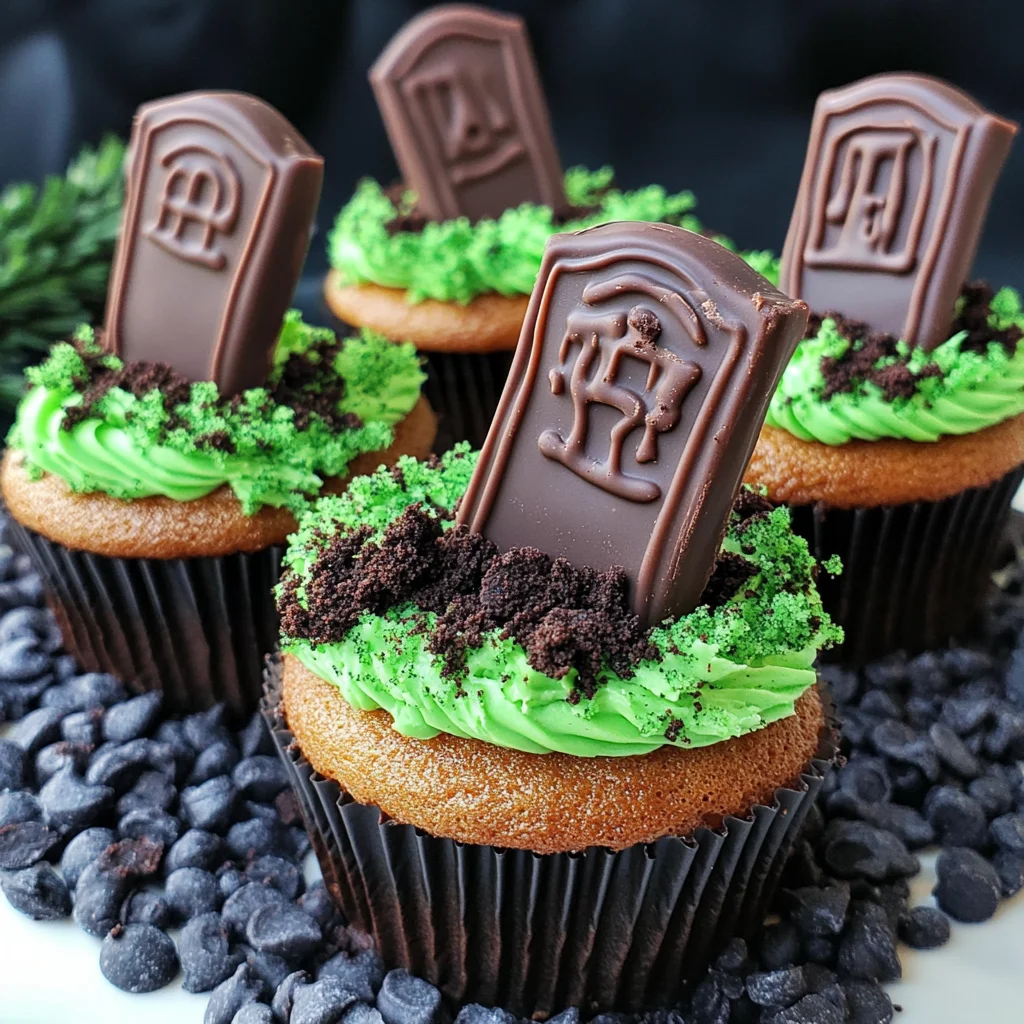
Chocolate cupcakes made to look like a graveyard. With oreo cheesecake filling, chocolate buttercream, Biscoff biscuit grave, oreo soil and green grass buttercream. Perfect for Halloween!
For the Cupcakes
- 12 Lotus biscoff biscuits
- 150 g Dark chocolate (melted)
- 30 g White chocolate (melted)
- 175 g Baking spread or butter (softened, unsalted)
- 175 g Caster sugar
- 3 Eggs (large)
- 2 tbsp Milk
- 150 g Self raising flour
- 25 g Cocoa powder
- 1/4 tsp Baking powder
For the Oreo Cheesecake Filling
- 115 g Full fat cream cheese
- 15 g Icing sugar
- 15 g Oreos (crushed)
- 1/8 tsp Vanilla extract
For the Chocolate Buttercream
- 100 g Butter (softened, unsalted)
- 165 g Icing sugar
- 35 g Cocoa powder
- 1-2 tsp Milk
For the Green Grass Buttercream
- 25 g Butter (softened, unsalted)
- 50 g Icing sugar
- 1/8 tsp Vanilla extract
- Green food colouring
- 35 g Oreos (crushed)
How to Make Halloween Graveyard Cupcakes
Step 1: Make the Biscuit Graves
Start by making the biscuit graves. Snap about a third of the biscuit off at the end; this makes them shorter and better-sized for the cupcake. Melt the dark chocolate and dip each biscuit into it before placing them onto baking paper to set.
Step 2: Decorate with White Chocolate
Once the dark chocolate is set, melt the white chocolate and transfer it to a piping bag. Pipe on your chosen designs onto the biscuits, then allow them to set again.
Step 3: Preheat Your Oven
To make the cupcakes, preheat your oven to 140C Fan/160C/325F/Gas Mark 3. Line a cupcake tin with cupcake cases.
Step 4: Prepare the Sponge Mixture
Mix together the baking spread and caster sugar using an electric whisk or stand mixer with the paddle attachment for about 5 minutes until light and fluffy.
Step 5: Add Eggs and Milk
Add in your eggs and milk. Whisk well until fully incorporated into the mixture.
Step 6: Fold in Dry Ingredients
Gently fold in self-raising flour, cocoa powder, and baking powder until just combined to keep your sponge light.
Step 7: Fill Cupcake Cases
Divide your cake batter between the lined cupcake cases evenly.
Step 8: Bake
Bake them in your preheated oven for 25-30 minutes or until a skewer inserted in the center comes out clean. Allow them to cool completely on a wire rack before decorating.
Step 9: Make Oreo Cheesecake Filling
While cooling, mix together cream cheese, icing sugar, and vanilla until smooth. Stir in crushed Oreos gently.
Step 10: Core Each Cupcake
Using a cupcake corer or knife, carefully make a hole in each cooled cupcake’s center.
Step 11: Fill with Cheesecake
Fill each hole with your prepared cheesecake mixture using either a spoon or piping bag for ease of use.
Step 12: Prepare Chocolate Buttercream
Mix together softened butter, cocoa powder, icing sugar, adding milk gradually until smooth. A stand mixer is recommended for best results here.
Step 13: Prepare Green Grass Buttercream
In another bowl, mix together butter and icing sugar. Add vanilla extract and green food coloring until you reach your desired shade of grass.
Step 14: Pipe Chocolate Buttercream
Using a piping bag fitted with a round nozzle, pipe chocolate buttercream onto each cupcake smoothly. You can also spread it on using a palette knife or spoon if you prefer.
Step 15: Insert Biscuit Gravestones
Carefully push one chocolate-covered biscuit gravestone into each cupcake at an angle for that spooky effect!
Step 16: Sprinkle Oreo Soil
Sprinkle crushed Oreos around each gravestone to mimic soil—this adds to your graveyard effect!
Step 17: Add Grass Details
Fill another piping bag with green buttercream fitted with a multi-opening nozzle to create grassy textures around each gravestone. Alternatively, add small blobs randomly around using a spoon.
Step 18: Store Properly
Store any leftovers in an airtight container in a cool place—these treats are best enjoyed within three days!
How to Serve Halloween Graveyard Cupcakes
These Halloween Graveyard Cupcakes are not just a treat for the taste buds; they also make a stunning centerpiece for your spooky celebrations. Here are some fun serving suggestions to elevate your Halloween gathering.
Spooky Platter
- Arrange the cupcakes on a large, themed platter surrounded by faux spider webs and plastic spiders for a creepy touch.
Individual Treat Bags
- Place each cupcake in a clear bag tied with black ribbon. This is perfect for party favors or a school Halloween event.
Halloween Party Table
- Set up a dedicated dessert table with the cupcakes as the main attraction. Use dark tablecloths and add candles for an eerie ambiance.
Themed Drink Pairing
- Serve with themed drinks like witches’ brew punch or dark sodas to complement the spooky theme of your cupcakes.
Kids’ Halloween Treats Station
- Create a DIY station where kids can decorate their own mini cupcakes, using leftover decorations from your graveyard cupcakes.
Ghoulish Garnishes
- Add gummy worms or candy eyeballs on top of the cupcakes for an extra creepy effect that will excite both kids and adults alike.
How to Perfect Halloween Graveyard Cupcakes
Making these cupcakes is all about attention to detail. Here are some tips to ensure they turn out perfectly every time.
- Use Room Temperature Ingredients: Bring your eggs and butter to room temperature before mixing. This helps create a smoother batter and better texture.
- Don’t Overmix: When combining dry ingredients with wet ones, mix just until incorporated. This keeps the cupcakes light and fluffy.
- Check Oven Temperature: Always preheat your oven and use an oven thermometer if possible. An accurate temperature ensures even baking.
- Cool Completely Before Frosting: Allowing the cupcakes to cool fully prevents the frosting from melting and maintains the intended look.
Best Side Dishes for Halloween Graveyard Cupcakes
To complement your Halloween Graveyard Cupcakes, consider serving some delightful side dishes that fit the spooky theme. Here are some great options:
- Witch’s Brew Soup: A vibrant green pea soup garnished with ghost-shaped croutons makes for a hauntingly delicious starter.
- Mummy Hot Dogs: Wrap hot dogs in crescent roll dough to resemble mummies, baking them until golden brown and adding mustard eyes.
- Monster Veggie Platter: Create a fun veggie platter featuring broccoli trees, carrot sticks as broomsticks, and hummus as swamp dip.
- Pumpkin Deviled Eggs: Make deviled eggs tinted orange with paprika and topped with chives to resemble little pumpkins on your table.
- Ghostly Cheese Balls: Shape cream cheese into ghost figures, rolling them in herbs or nuts, and serve with crackers for an easy appetizer.
- Spooky Cheese Platter: Include an assortment of cheeses with creepy labels like witch’s brie or gouda ghouls, adding fruit and nuts for variety.
- Creepy Pasta Salad: Toss together black olives (spiders), pasta shapes (ghosts), and a tangy dressing for a chilling side dish everyone will love.
Common Mistakes to Avoid
Making Halloween Graveyard Cupcakes can be fun, but there are common pitfalls to watch out for.
- Skipping the Cooling Step: Allowing cupcakes to cool completely is crucial. If you frost them too soon, the icing will melt and ruin the appearance.
- Overmixing Batter: Mixing too much can lead to dense cupcakes. Mix just until combined for a light and fluffy texture.
- Incorrect Oven Temperature: Always preheat your oven properly. An oven that’s too hot or too cold can affect baking time and cupcake rise.
- Not Measuring Ingredients Accurately: Use a kitchen scale or measuring cups for precision. Incorrect measurements can lead to unwanted textures or flavors.
- Ignoring the Filling Process: Filling cupcakes properly ensures every bite is delicious. Make sure to create enough space in the center before filling.
Storage & Reheating Instructions
Refrigerator Storage
- Store your Halloween Graveyard Cupcakes in an airtight container.
- They will stay fresh for up to 3 days in the refrigerator.
Freezing Halloween Graveyard Cupcakes
- Wrap each cupcake individually in plastic wrap.
- Place them in a freezer-safe container for up to 2 months.
Reheating Halloween Graveyard Cupcakes
- Oven: Preheat to 350°F (175°C) and warm for about 10 minutes. This helps retain moisture.
- Microwave: Heat on medium power for 10-15 seconds at a time. Be cautious not to overheat; they can dry out quickly.
- Stovetop: Use a steamer basket over boiling water for a few minutes. This method keeps them moist.
Frequently Asked Questions
Here are some common questions about making Halloween Graveyard Cupcakes.
Can I make Halloween Graveyard Cupcakes ahead of time?
Yes! You can prepare the cupcakes a day in advance and store them in an airtight container.
What can I substitute for dark chocolate?
You can use semi-sweet chocolate or even milk chocolate if you prefer a sweeter taste.
How do I achieve the best green grass buttercream?
Add green food coloring gradually until you reach your desired shade. Mix well for an even color.
Can I use gluten-free flour for these cupcakes?
Yes, you can substitute self-raising flour with gluten-free self-rising flour for a gluten-free version.
Are Halloween Graveyard Cupcakes customizable?
Absolutely! You can add different decorations, such as gummy worms or mini pumpkins, depending on your preferences.
Final Thoughts
These Halloween Graveyard Cupcakes are both spooky and delicious, making them perfect for any Halloween gathering. With options to customize decorations and flavors, they offer versatility that caters to various tastes. Try making these delightful treats and impress your friends and family this Halloween!
Did You Enjoy Making This Recipe? Please rate this recipe with ⭐⭐⭐⭐⭐ or leave a comment.
📖 Recipe Card
Print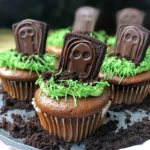
Halloween Graveyard Cupcakes
- Total Time: 1 hour
- Yield: Serves 12 cupcakes 1x
Description
Halloween Graveyard Cupcakes are an enchanting treat that perfectly blends spooky aesthetics with delectable flavors. These cupcakes feature a rich Oreo cheesecake filling, topped with chocolate buttercream and adorned with cookie gravestones and green grass buttercream, making them ideal for Halloween parties or festive gatherings. Not only do they look impressive, but they also offer a delightful taste experience that will thrill both kids and adults alike. With easy steps to follow, even novice bakers can create these charming desserts. Bring joy and a touch of fright to your celebrations with these spooky yet scrumptious treats!
Ingredients
- 12 Lotus Biscoff biscuits
- 150 g dark chocolate (melted)
- 175 g unsalted butter (softened)
- 175 g caster sugar
- 3 large eggs
- 150 g self-raising flour
- 25 g cocoa powder
- 115 g full-fat cream cheese
- 165 g icing sugar
- 1/8 tsp vanilla extract
- 1–2 tsp milk
- Green food coloring
Instructions
- Preheat your oven to 140C Fan/160C/325F/Gas Mark 3. Line a cupcake tin with cases.
- Prepare biscuit graves by dipping broken Biscoff biscuits in melted dark chocolate. Allow to set.
- In a bowl, mix softened butter and caster sugar until light and fluffy. Add eggs one at a time, mixing well after each addition.
- Gently fold in flour and cocoa powder until combined.
- Fill the cupcake cases evenly with batter and bake for 25-30 minutes until cooked through.
- Make the Oreo cheesecake filling by mixing cream cheese, icing sugar, and crushed Oreos until smooth.
- Core the cooled cupcakes and fill with the cheesecake mixture.
- Top each cupcake with chocolate buttercream and decorate with biscuit gravestones and green grass buttercream.
- Prep Time: 30 minutes
- Cook Time: 30 minutes
- Category: Dessert
- Method: Baking
- Cuisine: American
Nutrition
- Serving Size: 1 cupcake (100g)
- Calories: 350
- Sugar: 29g
- Sodium: 150mg
- Fat: 18g
- Saturated Fat: 10g
- Unsaturated Fat: 6g
- Trans Fat: 0g
- Carbohydrates: 42g
- Fiber: 2g
- Protein: 4g
- Cholesterol: 55mg