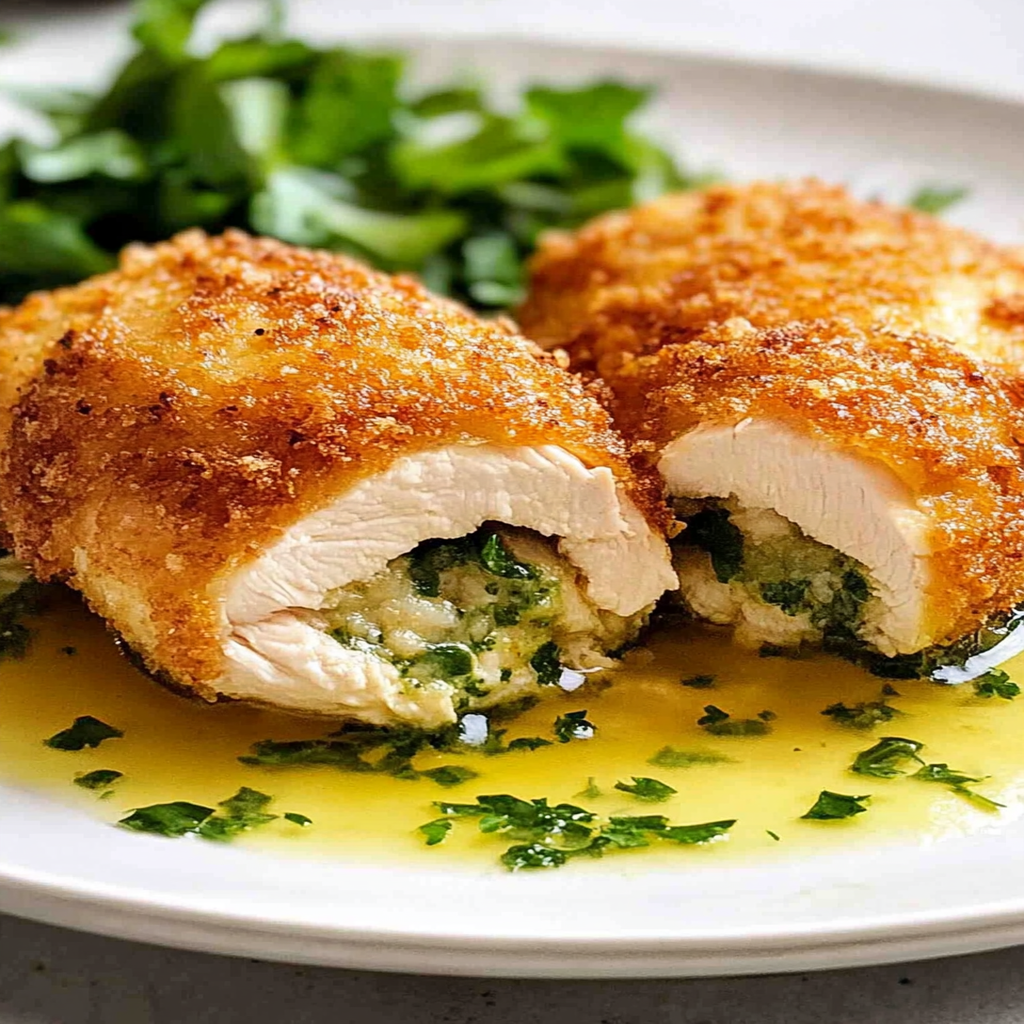
Chicken Kiev is a classic dish that combines the crispiness of fried chicken with a rich, flavorful garlic butter filling. Originating from Ukraine, this delectable meal has become popular worldwide for its satisfying taste and impressive presentation. Imagine cutting into a perfectly golden chicken breast, revealing a burst of melted herbed butter that seeps onto your plate. This recipe is not just about flavor; it’s also about creating an experience that brings family and friends together. Whether you serve it on a festive occasion or as a comforting weeknight dinner, Chicken Kiev is sure to impress your guests and delight your taste buds. In this post, you’ll learn how to make this scrumptious dish step-by-step, ensuring each bite is as good as the last. Follow along as we explore the ingredients, preparation steps, tips for success, and much more!

Jump to:
- Why You’ll Love This Chicken Kiev
- Ingredients for Chicken Kiev
- How to Make Chicken Kiev
- Tips and Tricks
- How to Serve Chicken Kiev
- Make Ahead and Storage
- Suggestions for Chicken Kiev:
- Avoid Using Frozen Chicken
- Don’t Skimp on the Butter
- Overcooking the Chicken
- Neglecting the Crust
- FAQs:
- What is Chicken Kiev?
- Can I make Chicken Kiev in advance?
- What sides pair well with Chicken Kiev?
- Is there a vegetarian version of Chicken Kiev?
- Conclusion for Chicken Kiev:
- 📖 Recipe Card
Why You’ll Love This Chicken Kiev
- Quick and Easy: Minimal prep time and straightforward steps make this recipe stress-free, even for novice cooks
- Flavorful and Versatile: Enjoy outstanding flavor with ingredients you can easily customize by adding your favorites or adjusting spices
- Perfect for Any Occasion: Ideal for casual gatherings, holiday celebrations, or weeknight dinners
Ingredients for Chicken Kiev
Here’s what you’ll need to make this delicious dish:
- Boneless, Skinless Chicken Breasts: I usually use about 3-4 chicken breasts, but you can adjust the amount depending on how many people you’re feeding
- Fresh Garlic: Choose firm, fresh garlic cloves for the best flavor
- Butter: Unsalted butter works best to control the seasoning in your filling
- Fresh Parsley: Finely chop fresh parsley to add color and freshness to the garlic butter
- Panko Breadcrumbs: These provide an extra crunch when frying the chicken
For the Sauce:
- Soy Sauce: Use low-sodium soy sauce to better control the saltiness
The full ingredients list, including measurements, is provided in the recipe card directly below.
How to Make Chicken Kiev
Follow these simple steps to prepare this delicious dish:
Step 1: Preheat Your Oven
Preheat oven to 400°F (200°C). Spray a baking dish with nonstick cooking spray. Season the chicken with salt and pepper.
Step 2: Prepare the Garlic Butter Filling
In a bowl, combine softened butter with minced garlic and chopped parsley. Mix well until fully combined.
Step 3: Fill the Chicken
Using a sharp knife, create a pocket in each chicken breast. Stuff each pocket generously with the garlic butter mixture.
Step 4: Coat the Chicken
Dredge each stuffed chicken breast first in flour, then dip into beaten eggs before coating thoroughly in panko breadcrumbs.
Step 5: Fry the Chicken
In a skillet over medium heat, add olive oil. Once hot, fry each breaded chicken breast for about 3-4 minutes on each side until golden brown.
Step 6: Bake in Oven
Transfer the fried chicken breasts to your prepared baking dish. Bake in preheated oven for about 15-20 minutes or until fully cooked through.
Transfer to plates and drizzle with sauce for the perfect finishing touch.
Tips and Tricks
Here are some helpful tips to ensure the best results for your dish:
- Even Cooking: Make sure all ingredients are cut to similar sizes for consistent cooking times
- Temperature Control: Let ingredients reach room temperature before starting for better results
- Advanced Technique: For enhanced flavor, try marinating the ingredients overnight
How to Serve Chicken Kiev
This Chicken Kiev is versatile and pairs wonderfully with:
- Rice or Potatoes: A hearty base that soaks up the delicious sauce.
- Fresh Salad: Adds a crisp and refreshing contrast to the rich flavors of the dish.
- Crusty Bread: Perfect for enjoying every last drop of the flavorful sauce.
Feel free to pair it with your favorite sides for a personalized meal!
Make Ahead and Storage
- Make Ahead: You can prepare the chicken mixture a day in advance. Simply combine the butter, herbs, and seasonings in a bowl, then refrigerate for up to 24 hours before use. Stuff the chicken breasts just before cooking.
- Storing: Leftover Chicken Kiev can be stored in an airtight container in the refrigerator for up to three days. For longer storage, consider freezing it wrapped tightly in plastic wrap and aluminum foil, where it can last for up to three months.
- Reheating: To reheat, place the chicken in an oven set to 350°F (175°C) for about 20 minutes or until heated through. Alternatively, you can microwave it on medium power for about 4-5 minutes, but this may affect the texture.
Suggestions for Chicken Kiev:
Avoid Using Frozen Chicken
Using frozen chicken can lead to uneven cooking and a rubbery texture. Always opt for fresh, high-quality chicken breasts when making Chicken Kiev. Fresh chicken absorbs flavors better and ensures that the dish turns out moist and tender. If you must use frozen chicken, ensure it is fully thawed in the refrigerator before cooking. This allows for even cooking and helps maintain the integrity of the meat. By prioritizing fresh ingredients, you’ll enhance the overall flavor profile of your Chicken Kiev.
Don’t Skimp on the Butter
One of the key components of Chicken Kiev is the herbed butter filling. Avoid using low-fat or margarine options, as they won’t provide the rich flavor and creamy texture that traditional recipes call for. Use high-quality unsalted butter mixed with fresh herbs like parsley, dill, and chives to create a flavorful filling. The butter should be softened enough to mix easily but not melted. When cooked, this herbed butter will ooze out of the chicken, creating a delightful sauce that elevates your dish.
Overcooking the Chicken
Overcooked chicken can become dry and unappetizing. To prevent this mistake, always use a meat thermometer to check for doneness. The internal temperature should reach 165°F (75°C) for safe consumption while ensuring juiciness. Cooking times will vary based on thickness; thus, it’s essential to monitor closely as it cooks. Letting the chicken rest for a few minutes after cooking also allows juices to redistribute throughout the meat, enhancing its flavor and moisture.
Neglecting the Crust
A crunchy crust is essential for a great Chicken Kiev experience. Avoid using only flour or breadcrumbs without seasoning; instead, create a flavorful crust by combining seasoned breadcrumbs with herbs and spices. Additionally, double-dipping in egg wash before coating with breadcrumbs ensures a thicker crust that holds up during frying or baking. If you want an extra crispy texture, consider using panko breadcrumbs instead of regular ones for added crunch.

FAQs:
What is Chicken Kiev?
Chicken Kiev is a classic dish consisting of a breaded and fried chicken breast filled with garlic herb butter. The name comes from Kyiv, Ukraine’s capital city. Traditionally served as an elegant main course, it features crispy outer layers that encase juicy chicken stuffed with melted herbed butter. When properly made, cutting into Chicken Kiev reveals an enticing butter flow that enhances the dish’s richness and flavor profile.
Can I make Chicken Kiev in advance?
Yes! You can prepare Chicken Kiev ahead of time by assembling it and freezing before cooking. After shaping the chicken breasts stuffed with herbed butter, wrap them tightly in plastic wrap or foil to prevent freezer burn. When ready to cook them, thaw them overnight in the refrigerator before baking or frying as directed in your recipe. This method allows you to enjoy freshly cooked Chicken Kiev without last-minute preparation stress.
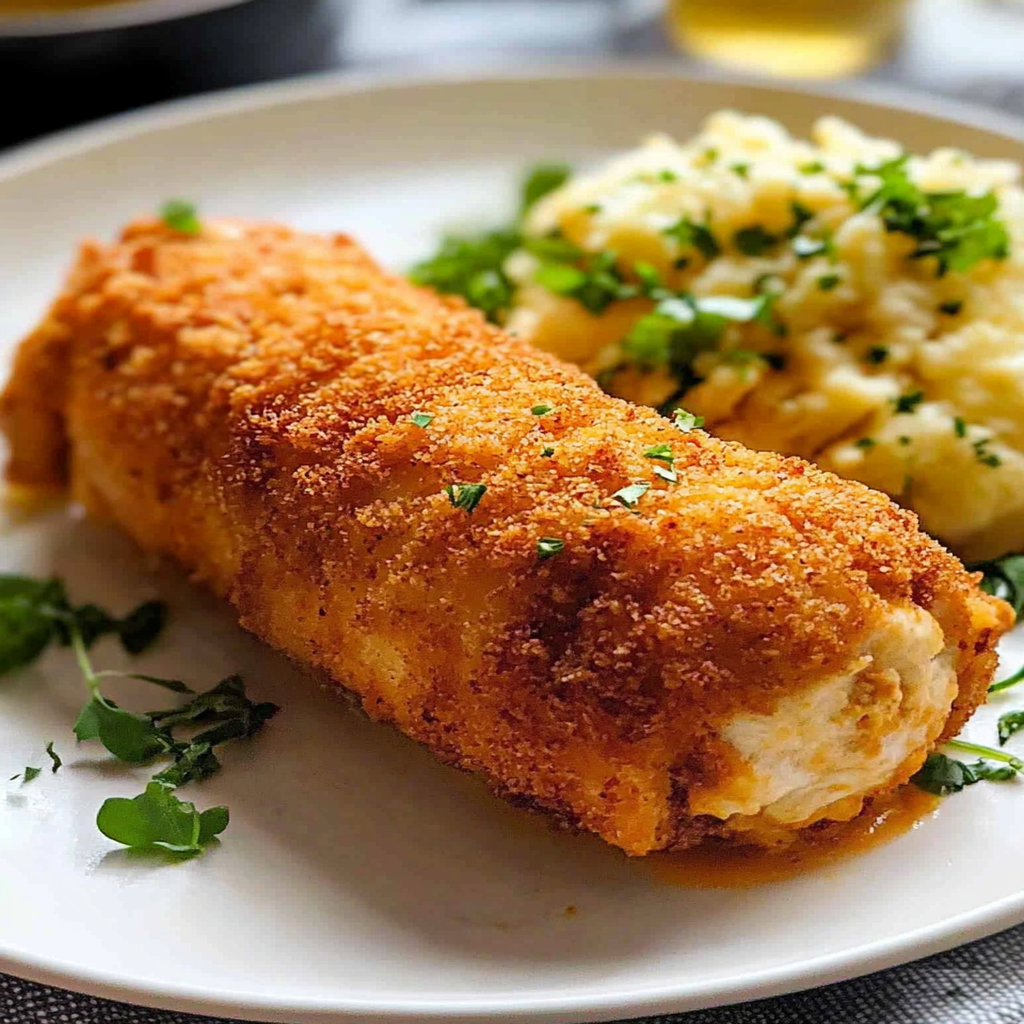
What sides pair well with Chicken Kiev?
Chicken Kiev pairs well with various sides that complement its rich flavors without overshadowing them. Consider serving it with garlic mashed potatoes or roasted vegetables to balance the meal’s richness. A fresh garden salad dressed lightly with vinaigrette adds brightness and contrast to the buttery chicken. Additionally, crusty bread can be a delightful option for soaking up any leftover garlic herb butter on your plate.
Is there a vegetarian version of Chicken Kiev?
Absolutely! A vegetarian version can be made using plant-based proteins like tofu or seitan as substitutes for chicken breasts. For filling, blend together vegan butter mixed with garlic and fresh herbs just like traditional recipes do. Coat these vegetarian options in breadcrumbs after dipping them in plant-based milk or aquafaba (chickpea liquid). Bake or fry until golden brown; this version delivers similar textures and flavors while catering to vegetarian diets.
Conclusion for Chicken Kiev:
In conclusion, mastering Chicken Kiev involves attention to detail in every step from ingredient selection to cooking techniques. Choosing fresh chicken ensures optimal texture while avoiding mistakes like skimping on quality butter enhances flavor significantly. Monitoring cooking times prevents dryness while creating an irresistible crust elevates presentation and taste alike. By avoiding common pitfalls outlined above and following these tips closely, you can create a delightful Chicken Kiev that impresses family and friends alike! Whether enjoyed as a main course or served alongside complementary sides, this dish is sure to become a favorite at your dining table!
Did You Enjoy Making This Recipe? Please rate this recipe with ⭐⭐⭐⭐⭐ or leave a comment.
📖 Recipe Card
Print
Chicken Kiev
- Total Time: 40 minutes
- Yield: Serves 4
Description
Chicken Kiev is a mouthwatering classic that brings together the crunch of golden-fried chicken with a luscious garlic herb butter filling. Originating from Ukraine, this dish captivates palates worldwide, offering a delightful experience with every bite. Enveloping juicy chicken breast in a crispy coating, Chicken Kiev reveals its rich buttery center upon slicing, making it an impressive centerpiece for any meal. Perfect for both celebratory occasions and comforting weeknight dinners, this recipe is straightforward enough for novice cooks while satisfying enough to impress seasoned chefs. Follow our easy preparation steps and tips to master this delicious dish and create unforgettable moments around the dinner table.
Ingredients
- Boneless, skinless chicken breasts
- Fresh garlic
- Unsalted butter
- Fresh parsley
- Panko breadcrumbs
- Low-sodium soy sauce
Instructions
- Preheat your oven to 400°F (200°C) and prepare a baking dish with cooking spray.
- In a bowl, mix softened butter with minced garlic and chopped parsley until well combined.
- Create pockets in each chicken breast and generously stuff them with the garlic butter mixture.
- Dredge each stuffed breast in flour, dip into beaten eggs, then coat with panko breadcrumbs.
- Fry in a skillet over medium heat until golden brown on both sides.
- Transfer to the baking dish and bake for 15-20 minutes until fully cooked.
- Prep Time: 15 minutes
- Cook Time: 25 minutes
- Category: Main
- Method: Frying/Baking
- Cuisine: Ukrainian
Nutrition
- Serving Size: 1 serving
- Calories: 360
- Sugar: 1g
- Sodium: 550mg
- Fat: 22g
- Saturated Fat: 10g
- Unsaturated Fat: 9g
- Trans Fat: 0g
- Carbohydrates: 18g
- Fiber: 1g
- Protein: 27g
- Cholesterol: 85mg