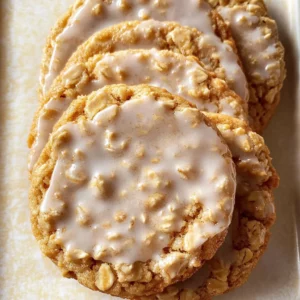
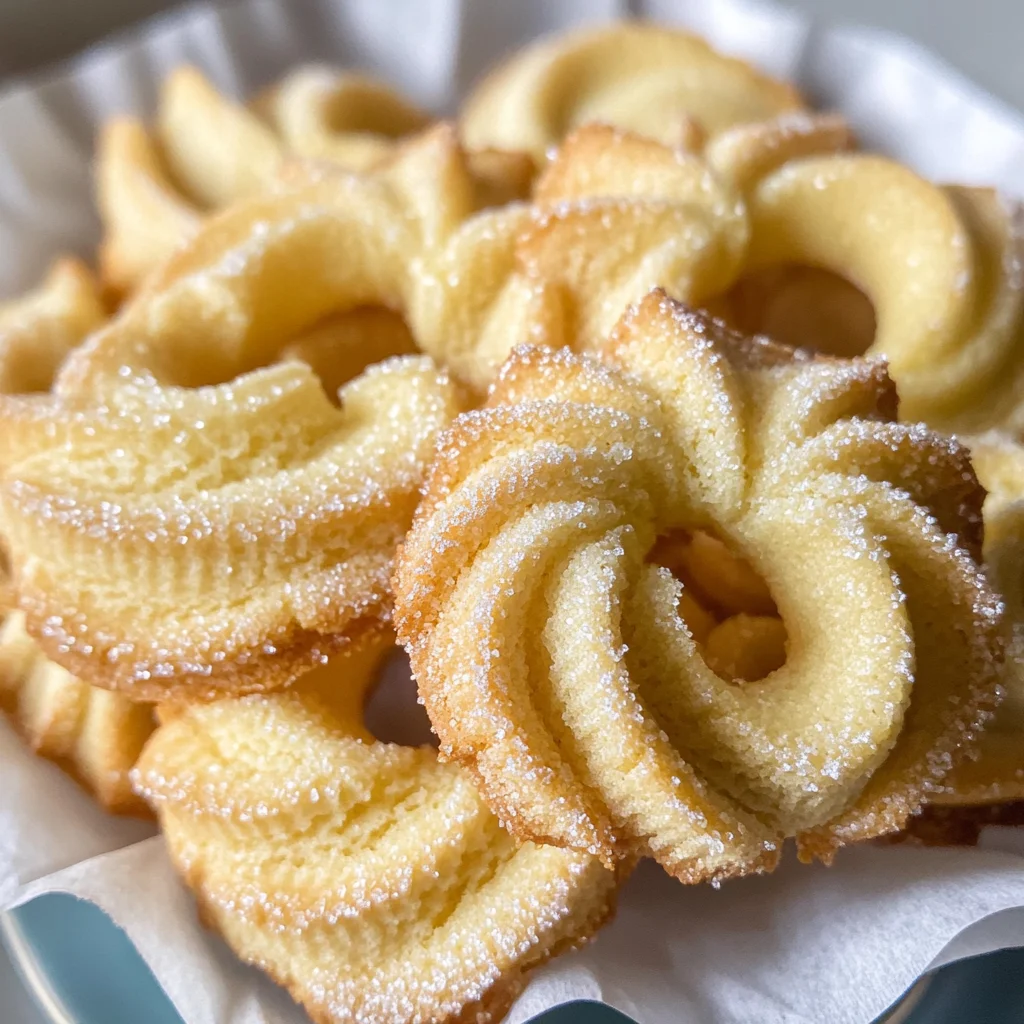
Light, crisp, and delicate, Danish Butter Cookies are a delightful treat that melts in your mouth. These cookies are perfect for any occasion, from festive gatherings to casual snack times. With just four simple ingredients, they’re a breeze to make and offer a rich, buttery flavor that stands out among other baked goods.

Jump to:
- Why You’ll Love This Recipe
- Tools and Preparation
- Essential Tools and Equipment
- Importance of Each Tool
- Ingredients
- How to Make Danish Butter Cookies
- Step 1: Prepare the Butter
- Step 2: Cream Ingredients
- Step 3: Incorporate the Flour
- Step 4: Forming the Dough Log
- Step 5: Pipe onto Baking Sheet
- Step 6: Adjust Dough Consistency (if needed)
- Step 7: Chill Before Baking
- Step 8: Sugar Sprinkling (Optional)
- Step 9: Bake Cookies
- Step 10: Cool Down
- How to Serve Danish Butter Cookies
- With Coffee or Tea
- As Party Favors
- At Afternoon Tea
- With Ice Cream
- On a Dessert Platter
- For Holiday Celebrations
- How to Perfect Danish Butter Cookies
- Best Side Dishes for Danish Butter Cookies
- Common Mistakes to Avoid
- Storage & Reheating Instructions
- Refrigerator Storage
- Freezing Danish Butter Cookies
- Reheating Danish Butter Cookies
- Frequently Asked Questions
- Can I use margarine instead of butter?
- What if my dough is too stiff?
- How do I know when my cookies are done?
- Can I customize Danish Butter Cookies?
- How should I store leftover cookies?
- Final Thoughts
- 📖 Recipe Card
Why You’ll Love This Recipe
- Simplicity: This recipe requires only four ingredients, making it easy even for novice bakers.
- Versatility: Enjoy them as a sweet snack or serve them at events and gatherings.
- Delicious Flavor: The combination of butter and vanilla creates a rich taste that’s hard to resist.
- Quick to Make: With minimal prep time, you can whip up a batch of cookies in under an hour.
- Perfect Texture: The cookies are light and airy, providing that ideal melt-in-your-mouth experience.
Tools and Preparation
Before diving into the baking process for these delightful Danish Butter Cookies, gather your tools and prepare your workspace. Having the right equipment ensures a smooth baking experience.
Essential Tools and Equipment
- Piping bag
- Stand mixer or handheld mixer
- Spatula
- Baking sheet
- Silicone mat or parchment paper
Importance of Each Tool
- Piping bag: Allows you to create beautiful shapes with your cookie dough for an appealing presentation.
- Stand mixer or handheld mixer: Makes creaming butter and sugar effortless, ensuring the right texture is achieved.
- Spatula: Essential for scraping down the sides of the bowl to incorporate all ingredients thoroughly.
Ingredients
Light, crisp and delicate, my recipe for these classic Danish Butter cookies are absolute melt in your mouth deliciousness. Made using just 4 basic ingredients, this is a super easy bake.
Ingredients:
– ½ cup butter (at room temperature)
– ½ cup powdered sugar
– 1 teaspoon vanilla extract
– 1 cup cake flour OR all-purpose flour (See note 1)
How to Make Danish Butter Cookies
Step 1: Prepare the Butter
Get the butter out of the refrigerator at least an hour before baking. It should be soft to the touch but not melted.
Step 2: Cream Ingredients
Cream the butter, sugar, and vanilla extract with a handheld or stand mixer for 5 to 8 minutes. The mixture should be light in color and fluffy in texture.
Step 3: Incorporate the Flour
Use a spatula to scrape down the dough from the sides of the bowl. Sift in the flour, adding it in increments (1/3 cup at a time). Fold it gently into the creamed mixture until fully incorporated.
Step 4: Forming the Dough Log
Transfer the dough onto plastic wrap and roll it into a log shape. Cut a hole in one end of the plastic wrap and place it into a piping bag fitted with a flower-tipped nozzle.
Step 5: Pipe onto Baking Sheet
Pipe the dough onto a baking sheet lined with either a silicone mat or parchment paper using a 1M open star piping tip.
Step 6: Adjust Dough Consistency (if needed)
If you find that the dough is too stiff to pipe easily, add one tablespoon of warm milk. This will help soften it for easier piping.
Step 7: Chill Before Baking
Place the baking sheet in the refrigerator for about 30 minutes. Chilling helps firm up piped cookies so they maintain their shape while baking.
Step 8: Sugar Sprinkling (Optional)
Before baking, you can sprinkle granulated sugar over each cookie if desired; otherwise, leave them plain.
Step 9: Bake Cookies
Bake in a preheated oven at 300°F/150°C (148°C fan) for about 15 minutes or until edges begin turning golden.
Step 10: Cool Down
Remove from oven and let cool on the baking sheet for about 10 minutes before serving or store them in an airtight container.
How to Serve Danish Butter Cookies
Danish Butter Cookies are delightful treats that can be served in various ways, making them perfect for any occasion. Whether you’re hosting a gathering or simply enjoying a quiet afternoon, these cookies can elevate your experience.
With Coffee or Tea
- Enjoy these cookies alongside a warm cup of coffee or tea. The rich butter flavor complements the drink perfectly.
As Party Favors
- Package the cookies in decorative boxes or bags as charming party favors. They make thoughtful gifts for guests.
At Afternoon Tea
- Serve Danish Butter Cookies during an afternoon tea gathering. Their delicate texture pairs wonderfully with scones and finger sandwiches.
With Ice Cream
- Crumble the cookies over your favorite ice cream for an added crunch and buttery flavor. This makes for a delicious dessert twist.
On a Dessert Platter
- Arrange the cookies on a dessert platter with fruits and chocolates. This makes for an elegant presentation at any event.
For Holiday Celebrations
- Decorate the cookies with festive icing or sprinkles to enjoy during holidays. They become a colorful addition to your festivities.
How to Perfect Danish Butter Cookies
To ensure your Danish Butter Cookies turn out just right, follow these helpful tips that enhance both flavor and texture.
- Use Room Temperature Butter: Make sure your butter is at room temperature for easy creaming and a better cookie consistency.
- Sift the Flour: Always sift your flour before adding it to the mixture. This helps achieve a lighter texture in your cookies.
- Chill the Dough: Refrigerating the piped dough before baking prevents spreading, ensuring that each cookie holds its beautiful shape.
- Watch Baking Time: Keep an eye on the baking process; remove the cookies when they start turning golden around the edges for optimal crunchiness.
- Experiment with Flavors: Add variations such as almond extract or lemon zest for a unique twist on classic Danish Butter Cookies.
Best Side Dishes for Danish Butter Cookies
Danish Butter Cookies can be complemented by various side dishes that enhance their delightful taste. Here are some tasty options:
- Fresh Fruit Salad: A light and refreshing side that balances the richness of the cookies.
- Chocolate Fondue: Dip pieces of cookie into warm chocolate for an indulgent treat that’s sure to please.
- Cheese Platter: Pairing with different types of cheese adds depth, making snack time even more enjoyable.
- Yogurt Parfait: Layer yogurt, granola, and crushed cookies for a delicious breakfast or dessert choice.
- Nut Mix: A bowl of mixed nuts provides a crunchy contrast to the soft texture of the cookies.
- Mini Pastries: Serve alongside small pastries like éclairs or tarts for an elegant dessert table setup.
Common Mistakes to Avoid
Making Danish Butter Cookies can be a delightful experience, but there are common pitfalls to watch out for.
- Using cold butter – Cold butter can make it difficult to achieve the right texture. Always ensure your butter is at room temperature before starting.
- Not creaming long enough – Failing to cream the butter and sugar for enough time can result in dense cookies. Aim for 5 to 8 minutes until light and fluffy.
- Ignoring flour types – Using the wrong type of flour can affect the cookie’s structure. Stick to cake flour or all-purpose flour as recommended in the recipe.
- Skipping refrigeration – Not refrigerating the piped dough can lead to cookies that spread during baking. Chill for at least 30 minutes to maintain shape.
- Overbaking – Baking too long can result in hard cookies. Keep an eye on them; they should be golden at the edges but soft in the center.
Storage & Reheating Instructions
Refrigerator Storage
- Store Danish Butter Cookies in an airtight container for up to 1 week.
- Ensure they are completely cooled before sealing to prevent moisture buildup.
Freezing Danish Butter Cookies
- You can freeze unbaked dough logs wrapped tightly in plastic wrap for up to 3 months.
- Baked cookies can also be frozen in an airtight container for up to 2 months.
Reheating Danish Butter Cookies
- Oven – Preheat your oven to 300°F (150°C) and warm for about 5-7 minutes for a fresh taste.
- Microwave – Heat a cookie on medium power for about 10-15 seconds. Be cautious not to overheat.
- Stovetop – Use a non-stick pan over low heat, turning frequently for about 3-5 minutes.
Frequently Asked Questions
Here are some commonly asked questions about making Danish Butter Cookies.
Can I use margarine instead of butter?
While margarine can be used, it may alter the flavor and texture of your cookies. For best results, stick with real butter.
What if my dough is too stiff?
If your dough feels too stiff to pipe, add a tablespoon of warm milk and mix until you reach a smoother consistency.
How do I know when my cookies are done?
Danish Butter Cookies are done when the edges start turning golden brown. They should remain soft in the middle even after cooling.
Can I customize Danish Butter Cookies?
Absolutely! You can add chocolate chips, nuts, or spices like cinnamon for a personal twist on this classic recipe.
How should I store leftover cookies?
Store leftover Danish Butter Cookies in an airtight container at room temperature for up to a week or freeze them for longer storage.
Final Thoughts
These Danish Butter Cookies are not only delightful but also incredibly versatile. With just four ingredients, they are easy to customize with flavors or toppings of your choice. Whether enjoyed with coffee or as an afternoon snack, these melt-in-your-mouth treats will quickly become a favorite. Don’t hesitate; try making them today!
Did You Enjoy Making This Recipe? Please rate this recipe with ⭐⭐⭐⭐⭐ or leave a comment.
📖 Recipe Card
Print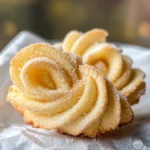
Danish Butter Cookies
- Total Time: 35 minutes
- Yield: Approximately 24 cookies 1x
Description
Danish Butter Cookies are the epitome of simple elegance, offering a delightful melt-in-your-mouth experience with every bite. With just four essential ingredients, these light and crisp cookies are perfect for any occasion—be it a festive gathering or a cozy afternoon snack. The rich flavor of butter combined with a hint of vanilla makes these cookies irresistibly delicious. They’re not only easy to prepare but also versatile enough to be enjoyed as-is or dressed up for special events. Whether paired with coffee or served as party favors, Danish Butter Cookies will surely impress your guests and become a beloved staple in your baking repertoire.
Ingredients
- ½ cup butter (at room temperature)
- ½ cup powdered sugar
- 1 teaspoon vanilla extract
- 1 cup cake flour or all-purpose flour
Instructions
- Ensure the butter is softened at room temperature.
- In a mixing bowl, cream together the butter, powdered sugar, and vanilla extract until light and fluffy (about 5-8 minutes).
- Gradually sift in the flour, folding gently until fully incorporated.
- Shape the dough into a log using plastic wrap and place it in a piping bag fitted with a star tip.
- Pipe the dough onto a baking sheet lined with parchment paper.
- Chill the piped cookies in the refrigerator for 30 minutes.
- Bake in a preheated oven at 300°F (150°C) for about 15 minutes until edges are golden.
- Allow cooling before serving.
- Prep Time: 20 minutes
- Cook Time: 15 minutes
- Category: Dessert
- Method: Baking
- Cuisine: Danish
Nutrition
- Serving Size: 1 cookie (approximately 14g)
- Calories: 70
- Sugar: 3g
- Sodium: 0mg
- Fat: 4g
- Saturated Fat: 2g
- Unsaturated Fat: 2g
- Trans Fat: 0g
- Carbohydrates: 8g
- Fiber: 0g
- Protein: 1g
- Cholesterol: 15mg