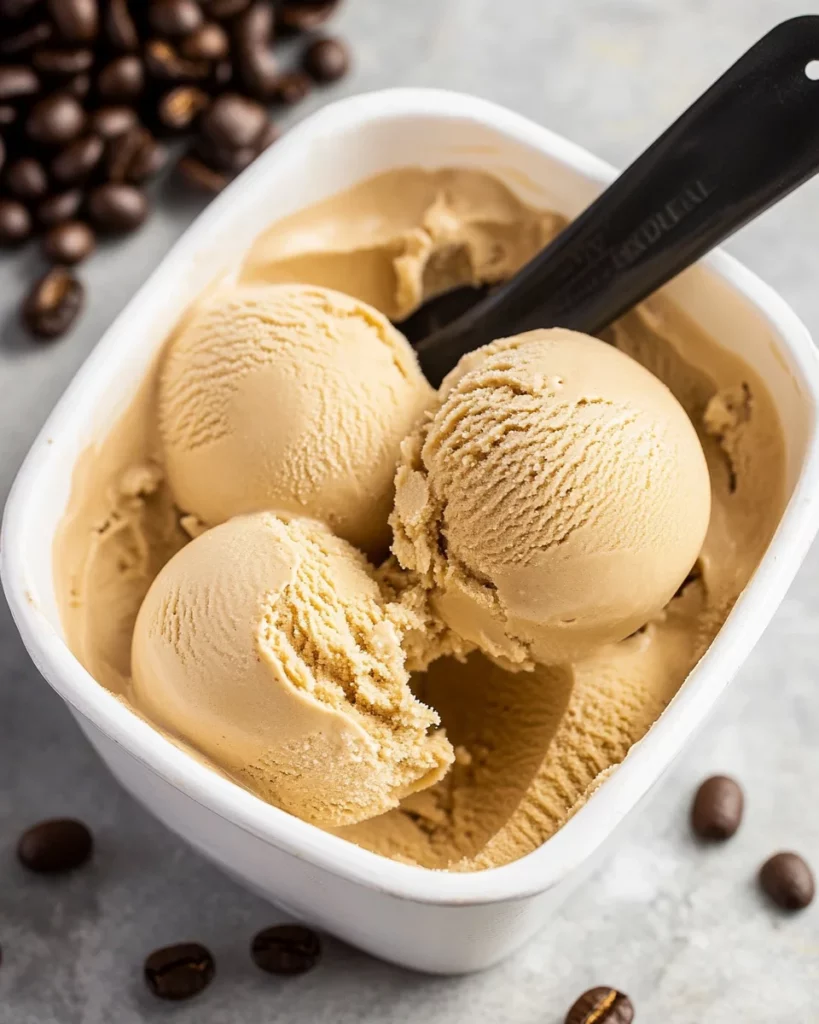
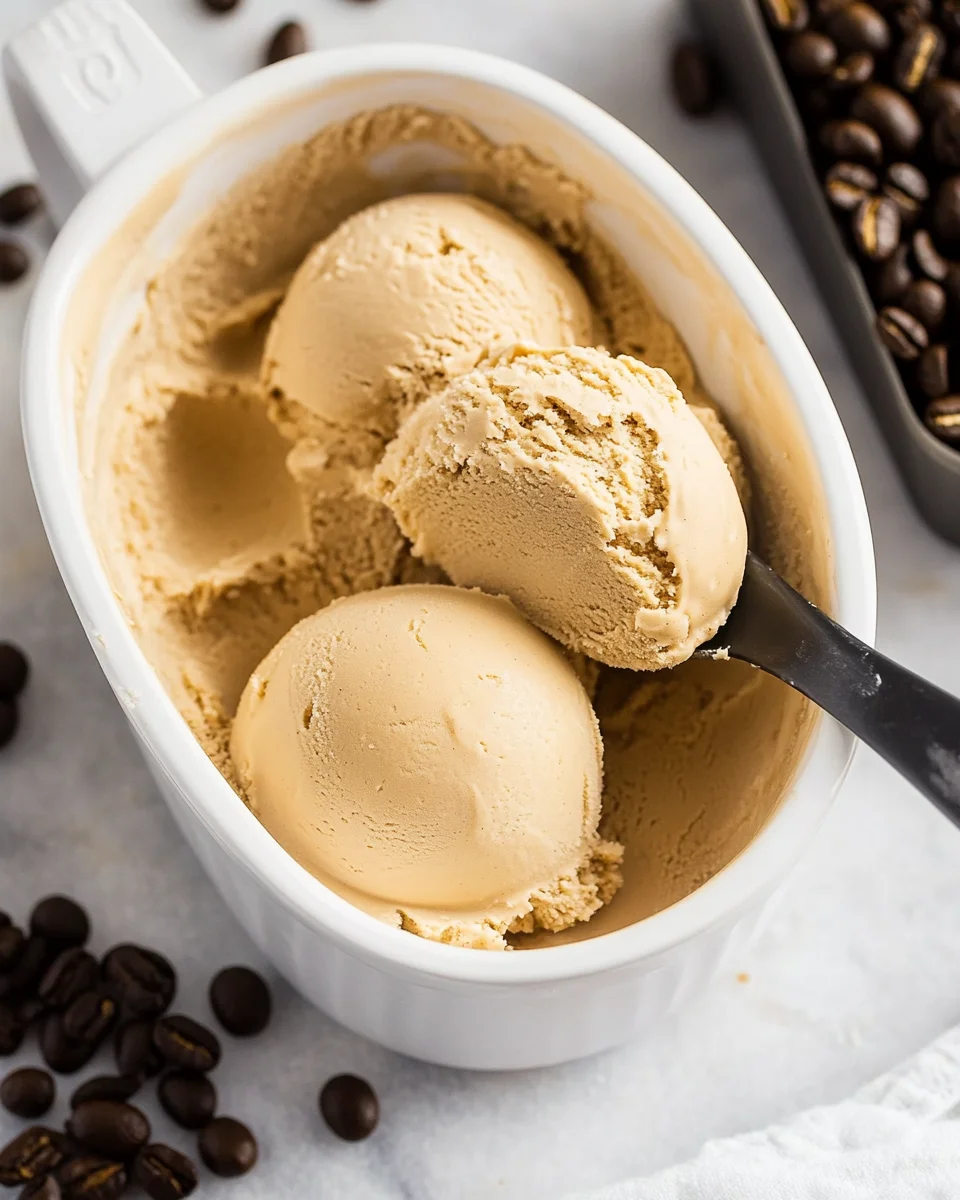
This Coffee Ice Cream is the perfect treat for coffee lovers! It’s rich, smooth, and creamy, making it an irresistible dessert for any occasion. Whether you’re hosting a summer barbecue or enjoying a cozy night in, this homemade ice cream will impress your friends and family. With just six ingredients and minimal prep time, you can whip up this delightful treat in no time.

Jump to:
- Why You’ll Love This Recipe
- Tools and Preparation
- Essential Tools and Equipment
- Importance of Each Tool
- Ingredients
- For the Ice Cream Base
- How to Make Coffee Ice Cream
- Step 1: Freeze the Ice Cream Maker Bowl
- Step 2: Whisk Ingredients Together
- Step 3: Heat Mixture Until Thickened
- Step 4: Cool the Mixture
- Step 5: Churn in Ice Cream Maker
- Step 6: Freeze Until Firm
- Step 7: Serve & Enjoy
- How to Serve Coffee Ice Cream
- With Chocolate Sauce
- Topped with Whipped Cream
- Served with Biscotti
- In an Affogato
- Sprinkled with Nuts
- Mixed with Fresh Berries
- How to Perfect Coffee Ice Cream
- Best Side Dishes for Coffee Ice Cream
- Common Mistakes to Avoid
- Storage & Reheating Instructions
- Refrigerator Storage
- Freezing Coffee Ice Cream
- Reheating Coffee Ice Cream
- Frequently Asked Questions
- How can I enhance the flavor of Coffee Ice Cream?
- Can I make Coffee Ice Cream without an ice cream maker?
- What type of coffee works best for Coffee Ice Cream?
- Is Coffee Ice Cream suitable for kids?
- How do I serve Coffee Ice Cream?
- Final Thoughts
- 📖 Recipe Card
Why You’ll Love This Recipe
- Easy to Make: With just six simple ingredients, this recipe is straightforward and quick.
- Rich Flavor: The combination of heavy cream and instant coffee delivers a satisfying coffee taste that’s hard to resist.
- Versatile Dessert: Serve it on its own or pair it with desserts like brownies or pie for a delicious twist.
- Homemade Goodness: Skip the store-bought options and enjoy the freshness of homemade ice cream.
- Perfect for Any Occasion: Whether it’s a special celebration or a casual dinner, this coffee ice cream fits right in.
Tools and Preparation
Before diving into making your Coffee Ice Cream, gather the necessary tools to ensure a smooth process.
Essential Tools and Equipment
- Ice cream maker
- Large saucepan
- Whisk
- Glass measuring cup or bowl
- Plastic wrap
- Loaf pan or baking dish
Importance of Each Tool
- Ice cream maker: Essential for churning the mixture into creamy ice cream.
- Large saucepan: Perfect for combining ingredients evenly over heat.
- Whisk: Helps achieve a smooth texture by thoroughly mixing the ingredients.
Ingredients
This Coffee Ice Cream is rich, smooth, creamy, and has just the right amount of coffee flavor. This 6-ingredient recipe takes just 20 minutes to prep!
For the Ice Cream Base
- 1½ cups heavy whipping cream
- 1½ cups whole milk
- ¾-1 cup granulated sugar (use more or less according to your tastes)
- 4 egg yolks
- 1 tablespoon instant coffee or espresso powder
- 1 tablespoon vanilla extract
How to Make Coffee Ice Cream
Step 1: Freeze the Ice Cream Maker Bowl
Freeze your ice cream maker bowl according to the manufacturer’s instructions. This step is crucial for achieving that perfect texture.
Step 2: Whisk Ingredients Together
In a large saucepan, whisk together:
1. Heavy whipping cream
2. Whole milk
3. Granulated sugar
4. Egg yolks
5. Instant coffee
Make sure everything is smooth before moving on.
Step 3: Heat Mixture Until Thickened
Place the pan on medium heat. Cook while whisking constantly until the mixture thickens noticeably but isn’t as thick as pudding. Stir in vanilla extract after removing from heat. Taste and adjust sweetness if needed.
Step 4: Cool the Mixture
Pour the mixture into a large glass measuring cup or bowl. Press plastic wrap against the surface to prevent skin formation as it cools. Refrigerate until completely cold—speed up by placing in the freezer and stirring every 10 minutes.
Step 5: Churn in Ice Cream Maker
Add chilled mixture to your ice cream maker and churn for 20-30 minutes until it reaches a soft serve consistency.
Step 6: Freeze Until Firm
Transfer the churned ice cream into a glass loaf pan or baking dish. Freeze until firm, about 4-6 hours.
Step 7: Serve & Enjoy
Let sit at room temperature for 5–10 minutes before serving for easier scooping. Cover leftovers with plastic wrap and freeze for up to three months.
Now you have delicious homemade Coffee Ice Cream ready to indulge your cravings!
How to Serve Coffee Ice Cream
Serving Coffee Ice Cream can turn a simple dessert into an unforgettable experience. Here are some delightful ways to elevate your coffee ice cream.
With Chocolate Sauce
- Drizzle warm chocolate sauce over the coffee ice cream for a rich, decadent treat.
Topped with Whipped Cream
- Add a generous dollop of whipped cream on top for added creaminess and texture.
Served with Biscotti
- Pair your coffee ice cream with crunchy biscotti for a perfect combination of flavors and a delightful crunch.
In an Affogato
- Pour hot espresso over a scoop of coffee ice cream for an indulgent affogato that blends hot and cold beautifully.
Sprinkled with Nuts
- Top with chopped nuts like almonds or hazelnuts for added crunch and flavor depth.
Mixed with Fresh Berries
- Add fresh berries such as raspberries or strawberries to balance the richness of the coffee ice cream.
How to Perfect Coffee Ice Cream
Achieving the perfect Coffee Ice Cream requires attention to detail. Here are some essential tips to ensure your dessert is smooth and flavorful.
- Use high-quality ingredients: Opt for organic milk and heavy cream for the best taste.
- Chill thoroughly: Make sure your mixture is completely cold before churning. This helps create a smoother texture.
- Churn properly: Follow your ice cream maker’s instructions closely to achieve the right consistency.
- Avoid over-churning: Stop once it reaches soft-serve consistency to prevent ice crystals from forming.
- Store correctly: Keep your coffee ice cream in an airtight container to maintain its freshness and prevent freezer burn.
Best Side Dishes for Coffee Ice Cream
Pairing side dishes with Coffee Ice Cream can enhance your dessert experience. Here are some delicious options to consider:
- Chocolate Chip Cookies – The classic cookie complements the coffee flavor perfectly.
- Brownies – Rich, fudgy brownies provide a delightful contrast in texture.
- Shortbread Cookies – Buttery shortbread adds a subtle sweetness that pairs well with coffee.
- Caramel Sauce – A drizzle of caramel creates a sweet, sticky combination that’s hard to resist.
- Fruit Salad – A refreshing fruit salad balances the richness of the ice cream, adding brightness.
- Pecan Pie – The nutty flavors of pecan pie harmonize beautifully with coffee notes.
- Cinnamon Rolls – Warm cinnamon rolls create a cozy pairing, perfect for brunch desserts.
- Cheesecake – A slice of cheesecake offers creamy richness that enhances the coffee flavor profile.
Common Mistakes to Avoid
Making coffee ice cream can be simple, but a few common mistakes can ruin your dessert. Here are some pitfalls to avoid:
- Skipping the chilling step: Not allowing your mixture to cool completely can result in an icy texture. Ensure you refrigerate it until it’s cold before churning.
- Using low-quality coffee: Poor coffee can compromise the flavor of your ice cream. Opt for good quality instant coffee or espresso powder for the best taste.
- Not whisking enough: Failing to whisk the mixture thoroughly while cooking can lead to lumps. Make sure to whisk constantly until it’s smooth and slightly thickened.
- Over-churning: Churning for too long can make your ice cream grainy. Keep an eye on the consistency and stop when it reaches a soft serve texture.
- Forgetting about leftovers: Leaving ice cream uncovered in the freezer can lead to freezer burn. Always cover it tightly with plastic wrap or store it in an airtight container.
Storage & Reheating Instructions
Refrigerator Storage
- Duration: Store any leftover mixture in the refrigerator for up to 2 days.
- Containers: Use an airtight container to keep it fresh.
Freezing Coffee Ice Cream
- Duration: Homemade coffee ice cream can be frozen for up to 3 months.
- Containers: For optimal storage, use a glass loaf pan or baking dish with a tight lid or plastic wrap.
Reheating Coffee Ice Cream
- Oven: Place in a preheated oven at 250°F (120°C) for a few minutes until softened.
- Microwave: Heat on low power in short bursts (10-15 seconds) until desired softness is reached.
- Stovetop: Use a saucepan over low heat, stirring gently until softened.
Frequently Asked Questions
Here are some common questions related to making Coffee Ice Cream:
How can I enhance the flavor of Coffee Ice Cream?
You can add chocolate chips, nuts, or even swirl in some caramel or fudge for extra flavor and texture.
Can I make Coffee Ice Cream without an ice cream maker?
Yes, you can use a no-churn method by whipping heavy cream and folding in sweetened condensed milk along with your coffee mixture before freezing.
What type of coffee works best for Coffee Ice Cream?
Using high-quality instant coffee or espresso powder will give you the richest flavor. Experiment with different brands to find your favorite!
Is Coffee Ice Cream suitable for kids?
While this recipe contains caffeine from the coffee, you can reduce the amount of coffee used or opt for decaf varieties if you’re concerned about caffeine intake.
How do I serve Coffee Ice Cream?
Serve it in bowls, cones, or use it as a topping on cakes and desserts. A sprinkle of cocoa powder or chocolate shavings makes for an elegant presentation!
Final Thoughts
This Coffee Ice Cream recipe is not only rich and creamy but also easy to customize based on your preferences. Whether you enjoy it plain or with toppings, it’s sure to impress! Don’t hesitate to experiment with flavors and mix-ins; the possibilities are endless!
Did You Enjoy Making This Recipe? Please rate this recipe with ⭐⭐⭐⭐⭐ or leave a comment.
📖 Recipe Card
Print
Coffee Ice Cream
- Total Time: 30 minutes
- Yield: Approximately 6 servings 1x
Description
Indulge in the delightful experience of homemade Coffee Ice Cream, a creamy and rich treat perfect for coffee enthusiasts. This easy-to-follow recipe requires just six simple ingredients, making it a breeze to whip up in your kitchen. With its smooth texture and intense coffee flavor, this ice cream is ideal for any occasion, whether you’re hosting a casual gathering or treating yourself after a long day. Pair it with brownies, drizzle it with chocolate sauce, or enjoy it on its own—this versatile dessert will surely impress your friends and family. In just 20 minutes of preparation time and a few hours of freezing, you can savor the delightful taste of fresh coffee ice cream made right at home!
Ingredients
- 1½ cups heavy whipping cream
- 1½ cups whole milk
- ¾–1 cup granulated sugar
- 4 egg yolks
- 1 tablespoon instant coffee or espresso powder
- 1 tablespoon vanilla extract
Instructions
- Freeze your ice cream maker bowl as per the manufacturer's instructions.
- In a large saucepan, whisk together the heavy whipping cream, whole milk, sugar, egg yolks, and instant coffee until smooth.
- Heat the mixture over medium heat while whisking continuously until it thickens slightly.
- Remove from heat, stir in vanilla extract, and let cool completely before refrigerating.
- Once chilled, churn the mixture in your ice cream maker for 20-30 minutes until soft serve consistency is reached.
- Transfer to a loaf pan and freeze for at least 4-6 hours until firm.
- Prep Time: 20 minutes
- Cook Time: 10 minutes
- Category: Dessert
- Method: Churning
- Cuisine: American
Nutrition
- Serving Size: 1 serving
- Calories: 280
- Sugar: 24g
- Sodium: 55mg
- Fat: 16g
- Saturated Fat: 10g
- Unsaturated Fat: 6g
- Trans Fat: 0g
- Carbohydrates: 28g
- Fiber: 0g
- Protein: 4g
- Cholesterol: 140mg