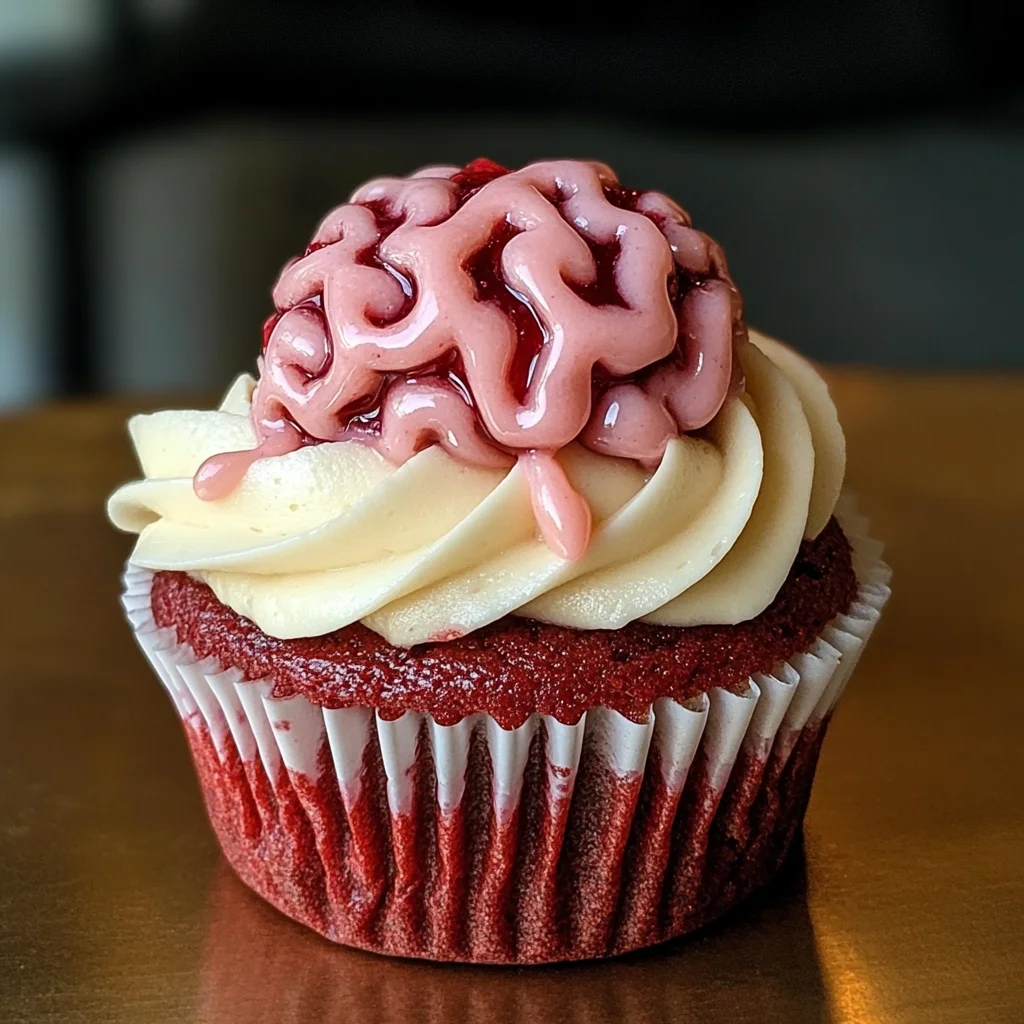
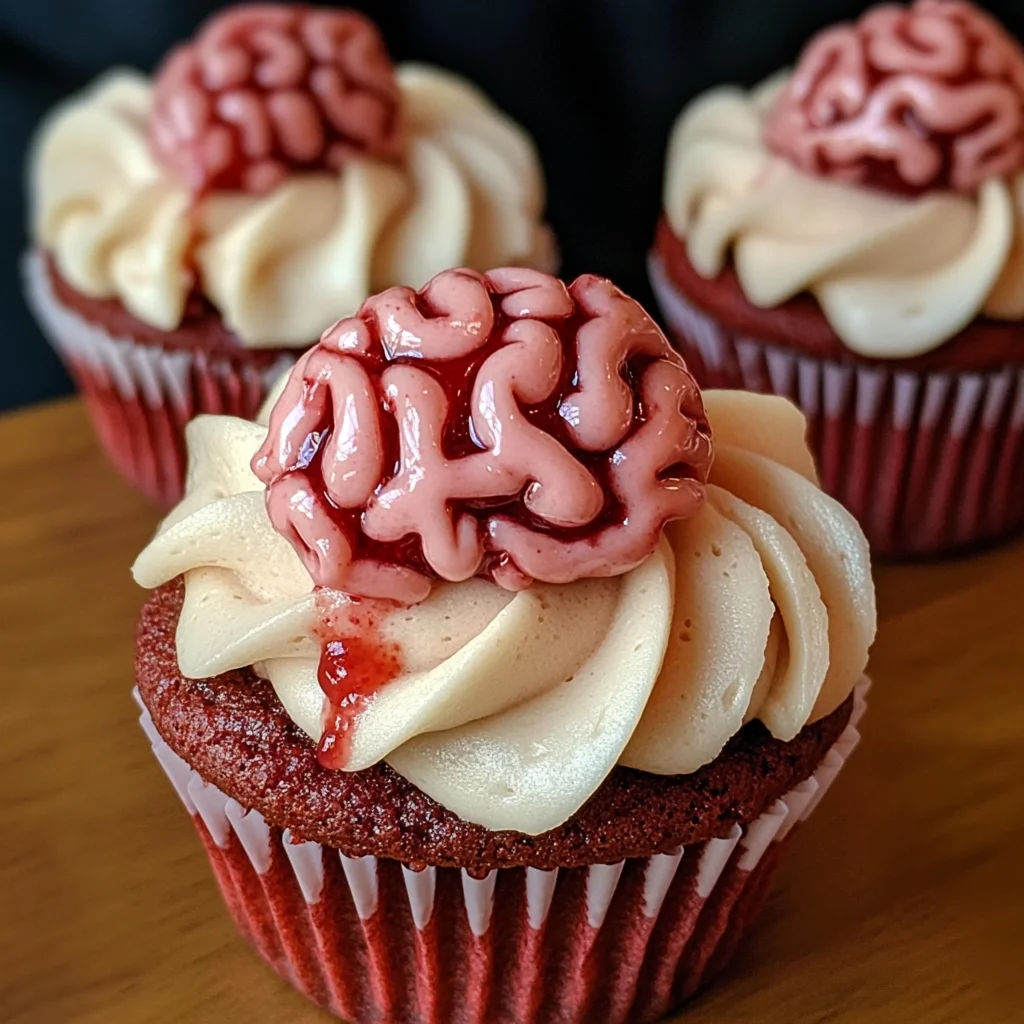
Bleeding Brain Cupcakes are a delightful and spooky treat perfect for Halloween or any themed party. These red velvet cupcakes, filled with sweet jam and topped with brain-themed pink icing, are sure to impress your guests. They combine the rich flavor of red velvet with a fun, creative presentation that makes them stand out. Whether you’re hosting a Halloween bash or looking for a unique dessert to celebrate a special occasion, these cupcakes will certainly add an element of fun and flavor to your table.
Jump to:
- Why You’ll Love This Recipe
- Tools and Preparation
- Essential Tools and Equipment
- Importance of Each Tool
- Ingredients
- For the Cupcakes
- For the Filling
- For the Buttercream Icing
- How to Make Bleeding Brain Cupcakes
- Step 1: Preheat the Oven
- Step 2: Prepare the Batter
- Step 3: Add Eggs and Flavorings
- Step 4: Mix Dry Ingredients
- Step 5: Fill Cupcake Cases
- Step 6: Bake
- Step 7: Core Cupcakes
- Step 8: Fill with Jam
- Step 9: Make Buttercream Icing
- Step 10: Combine Icing Ingredients
- Step 11: Decorate Cupcakes
- Step 12: Store Your Treats
- How to Serve Bleeding Brain Cupcakes
- Display on a Spooky Platter
- Accompany with Gory Drinks
- Add Edible Decorations
- Create a Dessert Table
- Pair with Halloween Candies
- How to Perfect Bleeding Brain Cupcakes
- Best Side Dishes for Bleeding Brain Cupcakes
- Common Mistakes to Avoid
- Storage & Reheating Instructions
- Refrigerator Storage
- Freezing Bleeding Brain Cupcakes
- Reheating Bleeding Brain Cupcakes
- Frequently Asked Questions
- What makes Bleeding Brain Cupcakes perfect for Halloween?
- Can I use different flavors of jam?
- How do I achieve the perfect brain icing effect?
- Are Bleeding Brain Cupcakes suitable for kids?
- How can I customize my Bleeding Brain Cupcakes?
- Final Thoughts
- 📖 Recipe Card
Why You’ll Love This Recipe
- Unique Presentation – The brain-themed icing makes these cupcakes an eye-catching dessert that is sure to be a hit at any gathering.
- Delicious Flavor – The combination of rich red velvet cake and sweet jam creates a delightful contrast in taste.
- Easy to Make – With straightforward steps, even novice bakers can create these impressive treats with confidence.
- Versatile for Occasions – Perfect for Halloween, birthday parties, or any festive celebration; they fit right in with the theme.
- Fun for Kids – Involving children in the decorating process can make baking these cupcakes an enjoyable family activity.
Tools and Preparation
Before diving into the fun part of baking Bleeding Brain Cupcakes, ensure you have the right tools on hand. Having everything ready will streamline your baking process.
Essential Tools and Equipment
- Electric mixer
- Mixing bowls
- Cupcake tin
- Black cupcake cases
- Piping bag with round nozzle
- Cupcake corer or knife
Importance of Each Tool
- Electric mixer – This tool saves time and helps achieve a fluffy batter by thoroughly mixing ingredients.
- Cupcake tin – Essential for shaping your cupcakes uniformly while allowing them to rise perfectly.
- Piping bag with round nozzle – Perfect for creating the intricate brain design on top of your cupcakes.
Ingredients
Red velvet cupcake, filled with jam, topped with brain themed pink icing – perfect for Halloween!
For the Cupcakes
- 150 g Butter or baking spread (softened, unsalted)
- 150 g Caster sugar
- 2 Eggs (large)
- 1 tsp Vanilla extract
- 85 ml Buttermilk
- 165 g Self raising flour
- 1 1/2 tbsp Cocoa powder
- 1/2 tsp Bicarbonate of soda
- 1 tsp Red food colouring (I use Pro Gel or Sugarflair)
For the Filling
- 200 g Strawberry or Raspberry Jam
For the Buttercream Icing
- 200 g Butter (unsalted, softened)
- 400 g Icing sugar
- 1 tsp Vanilla extract
- 2 tbsp Milk
- Pink food colouring (I use Pro Gel or Sugarflair)
How to Make Bleeding Brain Cupcakes
Step 1: Preheat the Oven
Pre-heat your oven to 160C Fan/180C/350F/Gas Mark 4. Line a cupcake tin with black cupcake cases.
Step 2: Prepare the Batter
Whisk the butter and sugar together in a mixing bowl until fluffy. Use an electric mixer if possible for best results.
Step 3: Add Eggs and Flavorings
Incorporate the eggs and vanilla extract into the mixture. Mix until well combined.
Step 4: Mix Dry Ingredients
Combine buttermilk, cocoa powder, bicarbonate of soda, red food coloring, and self-raising flour into the mixture. Stir until fully combined.
Step 5: Fill Cupcake Cases
Divide the batter evenly between the lined cupcake cases.
Step 6: Bake
Bake for 20-25 minutes until a skewer inserted in the center comes out clean. Allow them to cool completely on a wire rack.
Step 7: Core Cupcakes
Once cooled, use a cupcake corer or knife to create a hole in each cupcake’s center.
Step 8: Fill with Jam
Fill each hole with strawberry or raspberry jam using a small spoon or piping bag.
Step 9: Make Buttercream Icing
Mix softened butter alone for about two minutes using an electric mixer. This step ensures smoothness before adding other ingredients.
Step 10: Combine Icing Ingredients
Add icing sugar, milk, vanilla extract, and a small amount of pink food coloring. Mix until smooth; adjust consistency as needed by adding more milk if too stiff.
Step 11: Decorate Cupcakes
Transfer buttercream into a piping bag fitted with a circular nozzle. Pipe lines down the center of each cupcake followed by squiggles on either side to create the brain effect.
Step 12: Store Your Treats
Keep your Bleeding Brain Cupcakes in an airtight container in a cool place. Enjoy leftovers within three days for optimal freshness!
How to Serve Bleeding Brain Cupcakes
Bleeding Brain Cupcakes are not just a treat; they’re a fun addition to any Halloween gathering. Whether you’re hosting a spooky party or enjoying a cozy night in, these cupcakes can be served in various creative ways.
Display on a Spooky Platter
- Use a black or orange platter to showcase your cupcakes. This enhances the Halloween theme and makes them look even more enticing.
Accompany with Gory Drinks
- Serve with themed drinks like “blood” punch made from cranberry juice and soda for an eerie effect. This pairing amplifies the festive atmosphere.
Add Edible Decorations
- Sprinkle edible glitter or candy eyes around the cupcakes for added fright and fun. These small touches can make your dessert table pop!
Create a Dessert Table
- Set up a dedicated dessert table featuring Bleeding Brain Cupcakes alongside other spooky treats like ghost cookies and graveyard pudding cups. This creates an inviting focal point for guests.
Pair with Halloween Candies
- Offer assorted Halloween candies like gummy worms or chocolate spiders next to the cupcakes. This adds variety and encourages guests to indulge their sweet tooth.
How to Perfect Bleeding Brain Cupcakes
Creating the perfect Bleeding Brain Cupcakes requires attention to detail and a few helpful tips. Follow these suggestions to impress your guests.
- Use Quality Ingredients: Opt for high-quality butter and fresh eggs for better flavor and texture in your cupcakes.
- Measure Accurately: Ensure precise measurements of all ingredients, especially flour and sugar, to achieve the right consistency.
- Cool Completely: Let your cupcakes cool fully before filling them with jam. This prevents melting and ensures the jam stays intact.
- Piping Technique: Practice piping techniques on parchment paper before decorating your cupcakes for smooth, professional-looking results.
- Adjust Food Coloring Gradually: When adding food coloring, start small. You can always add more, but it’s hard to lighten it once it’s too dark.
- Store Properly: Keep any leftovers in an airtight container at room temperature to maintain freshness up to three days.
Best Side Dishes for Bleeding Brain Cupcakes
Complement your Bleeding Brain Cupcakes with delightful side dishes that enhance the Halloween theme. Here are some tasty ideas:
- Witch’s Brew Soup: A vibrant green soup made with spinach and peas, perfect for setting the mood.
- Monster Meatballs: Delicious meatballs dressed up as monsters using olives for eyes—fun and tasty!
- Creepy Veggie Platter: Arrange carrots, cucumbers, and bell peppers in ghostly shapes accompanied by a spooky dip.
- Haunted Hummus: Serve hummus decorated with olive spiders on top, giving it an eerie yet appetizing look.
- Mummy Hot Dogs: Wrap hot dogs in crescent roll dough to create mummies—simple yet adorable!
- Halloween Nachos: Top tortilla chips with black olives and cheese shaped like bones for a savory snack that fits the theme.
- Spooky Cheese Platter: Include cheeses cut into bone shapes alongside crackers; this adds elegance while keeping it fun.
- Ghoulish Fruit Cups: Offer fruit salad in themed cups decorated with monster faces—healthy and enjoyable!
Common Mistakes to Avoid
When making Bleeding Brain Cupcakes, even small missteps can lead to disappointing results. Here are some common mistakes to watch for:
- Using cold ingredients: Always ensure your butter and eggs are at room temperature before mixing. This helps create a smoother batter and better texture.
- Overmixing the batter: Mixing too much can lead to dense cupcakes. Stir until just combined for light, fluffy results.
- Ignoring baking times: Every oven is different. Start checking your cupcakes a few minutes early to avoid overbaking.
- Not using a cupcake corer: If you skip this step, you miss the chance to fill your cupcakes with delicious jam. A simple knife can work in a pinch, but a corer is best for the perfect fill.
- Skipping the cooling process: Don’t rush. Allowing cupcakes to cool completely prevents the icing from melting and maintains its shape.
Storage & Reheating Instructions
Refrigerator Storage
- Store in an airtight container.
- They will keep fresh for up to 3 days in the fridge.
Freezing Bleeding Brain Cupcakes
- Wrap each cupcake individually in plastic wrap.
- Place them in a freezer-safe container or bag.
- They can be frozen for up to 2 months.
Reheating Bleeding Brain Cupcakes
- Oven: Preheat to 180C (350F) and warm for about 10 minutes for optimal texture.
- Microwave: Heat on a low setting for 10-15 seconds; be careful not to overdo it as it can dry them out.
- Stovetop: Not recommended as it may change the texture.
Frequently Asked Questions
What makes Bleeding Brain Cupcakes perfect for Halloween?
These cupcakes feature a spooky design with vibrant red filling that resembles blood, making them ideal treats for Halloween parties and events.
Can I use different flavors of jam?
Absolutely! While strawberry or raspberry jam is traditional, feel free to experiment with other flavors like cherry or blackberry for unique twists on Bleeding Brain Cupcakes.
How do I achieve the perfect brain icing effect?
To create the brain effect, pipe a smooth line down the center of each cupcake followed by squiggly lines on either side. This simple technique gives them their creepy charm!
Are Bleeding Brain Cupcakes suitable for kids?
Definitely! These fun cupcakes are loved by kids. Just ensure any decorations are appropriate, and they’ll enjoy these spooky treats at Halloween gatherings.
How can I customize my Bleeding Brain Cupcakes?
You can customize colors and flavors! Try using blue or green food coloring for a different look or add edible glitter on top for extra spookiness.
Final Thoughts
Bleeding Brain Cupcakes are not only visually stunning but also deliciously moist and flavorful. With their eye-catching design, they make an excellent addition to Halloween celebrations or any themed event. Feel free to customize the flavors and colors to fit your style and impress your guests!
Did You Enjoy Making This Recipe? Please rate this recipe with ⭐⭐⭐⭐⭐ or leave a comment.
📖 Recipe Card
Print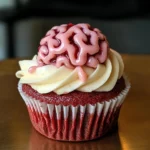
Bleeding Brain Cupcakes
- Total Time: 45 minutes
- Yield: Approximately 12 servings 1x
Description
Get ready to impress your guests with Bleeding Brain Cupcakes, the ultimate Halloween treat! These whimsical red velvet cupcakes are filled with sweet jam and topped with a creatively crafted pink icing that resembles brains. Perfect for any spooky celebration, these cupcakes offer a delightful combination of rich flavor and eye-catching presentation. Easy to make and fun to decorate, they are a fantastic activity for both novice bakers and families. Whether you’re hosting a Halloween party or looking for a unique dessert for any themed event, these spooky yet delicious cupcakes will steal the show!
Ingredients
- 150 g unsalted butter
- 150 g caster sugar
- 2 large eggs
- 1 tsp vanilla extract
- 85 ml buttermilk
- 165 g self-raising flour
- 1 ½ tbsp cocoa powder
- 1 tsp red food coloring
- 200 g strawberry or raspberry jam
- 200 g unsalted butter (for buttercream)
- 400 g icing sugar
- 1 tsp vanilla extract (for buttercream)
- 2 tbsp milk
- pink food coloring
Instructions
- Preheat your oven to 160C (fan) or 180C (conventional).
- Line a cupcake tin with black cases.
- Cream together softened butter and sugar until fluffy.
- Add eggs and vanilla; mix well.
- Combine dry ingredients with buttermilk and red food coloring; stir.
- Fill each cupcake case with batter evenly.
- Bake for 20-25 minutes until a skewer comes out clean.
- Let cool completely before coring and filling with jam.
- Prepare buttercream by mixing softened butter before adding icing sugar, milk, and pink food coloring; pipe onto cooled cupcakes.
- Prep Time: 20 minutes
- Cook Time: 25 minutes
- Category: Dessert
- Method: Baking
- Cuisine: American
Nutrition
- Serving Size: 1 serving
- Calories: 220
- Sugar: 24g
- Sodium: 150mg
- Fat: 10g
- Saturated Fat: 5g
- Unsaturated Fat: 4g
- Trans Fat: 0g
- Carbohydrates: 30g
- Fiber: 1g
- Protein: 3g
- Cholesterol: 45mg