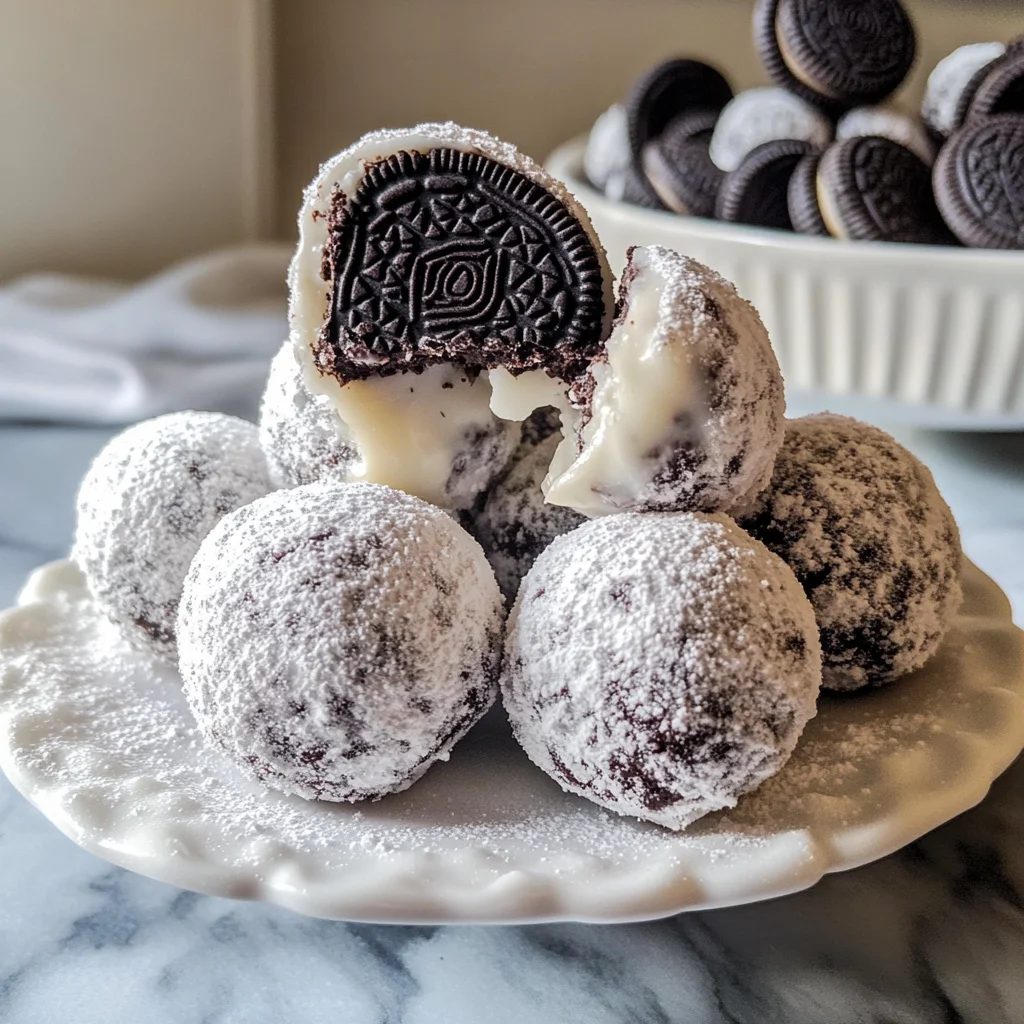
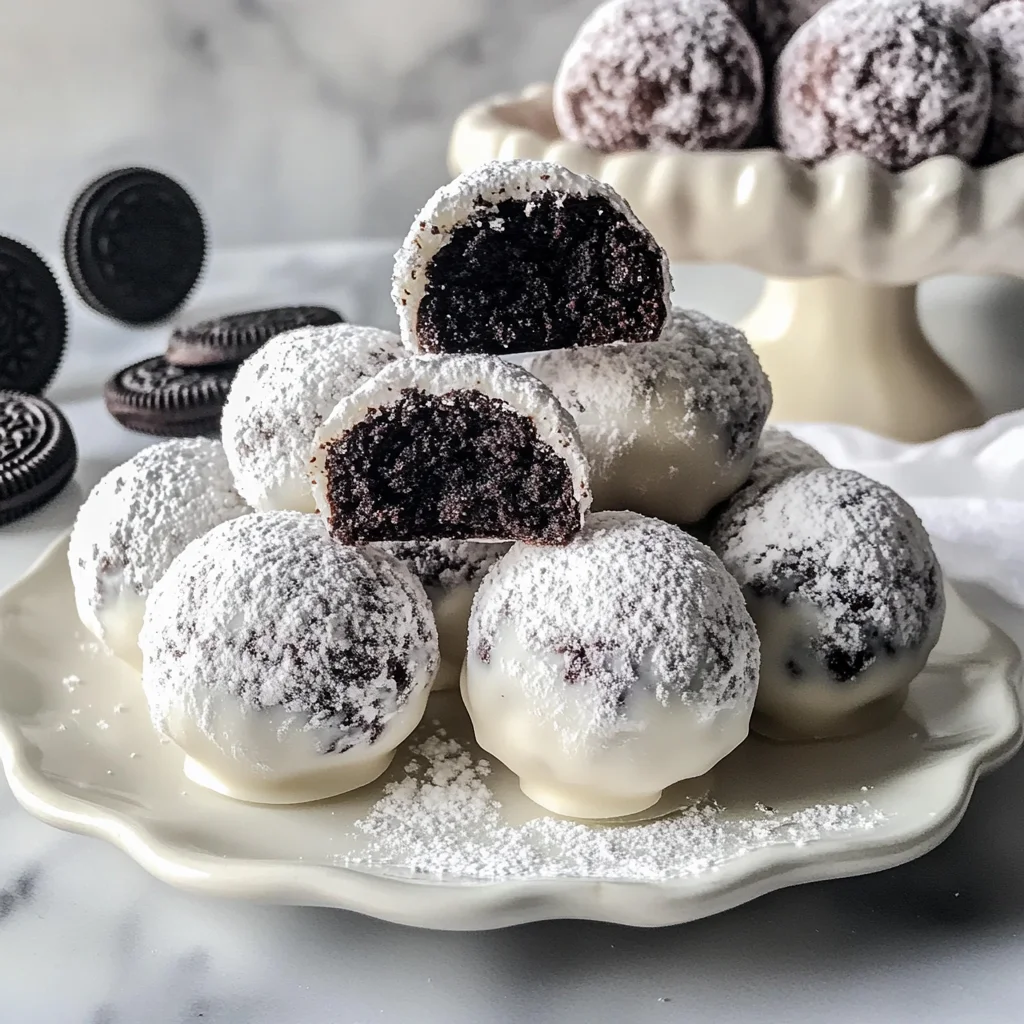
These Snowball Oreo Cookie Balls are a delightful treat that everyone will love! With their rich, creamy filling and sweet outer coating, they make an ideal dessert for holidays or any gathering. The best part? They’re super easy to whip up and require no baking! These cookie balls are sure to impress your guests and satisfy your sweet tooth.
Jump to:
- Why You’ll Love This Recipe
- Tools and Preparation
- Essential Tools and Equipment
- Importance of Each Tool
- Ingredients
- For the Creamy Filling
- How to Make Snowball Oreo Cookie Balls
- Step 1: Prepare Your Baking Sheet
- Step 2: Mix Your Ingredients
- Step 3: Shape the Cookie Balls
- Step 4: Chill Before Serving
- How to Serve Snowball Oreo Cookie Balls
- Individual Treats
- Platter Display
- Gift Jars
- Dessert Table Feature
- Themed Decoration
- How to Perfect Snowball Oreo Cookie Balls
- Best Side Dishes for Snowball Oreo Cookie Balls
- Common Mistakes to Avoid
- Storage & Reheating Instructions
- Refrigerator Storage
- Freezing Snowball Oreo Cookie Balls
- Reheating Snowball Oreo Cookie Balls
- Frequently Asked Questions
- Can I use low-fat cream cheese?
- How do I customize Snowball Oreo Cookie Balls?
- How many servings does this recipe make?
- Can I make these ahead of time?
- Final Thoughts
- 📖 Recipe Card
Why You’ll Love This Recipe
- No-Bake Convenience: These treats come together without the need for an oven, making them a perfect choice for hot days or last-minute gatherings.
- Irresistible Flavor: The combination of OREO Cookies and cream cheese creates a rich and creamy flavor that is simply delicious.
- Quick Preparation: With just 20 minutes of prep time, you can have these Snowball Oreo Cookie Balls ready in no time.
- Versatile Treat: They are great for holidays, parties, or just as a sweet snack at home.
- Simple Ingredients: You only need three basic ingredients to create this tasty dessert, keeping it accessible for everyone.
Tools and Preparation
Before diving into the fun of making Snowball Oreo Cookie Balls, gather your tools. Having everything prepared will streamline the process and ensure success.
Essential Tools and Equipment
- Large rimmed baking sheet
- Wax paper
- Mixing bowl
- Mixer (handheld or stand)
- Measuring cups
Importance of Each Tool
- Large rimmed baking sheet: This is essential for catching any drips while you work and provides ample space for your cookie balls.
- Mixer: A mixer helps blend the cream cheese with the crushed cookies thoroughly, ensuring a smooth consistency.
Ingredients
These easy no-bake OREO Cookie Balls made with OREO Cookies and cream cheese are the perfect holiday or any time treat!
For the Creamy Filling
- 1 8 oz. brick cream cheese, (softened)
- 36 OREO Cookies, (finely crushed)
- 1/2 cup powdered sugar
How to Make Snowball Oreo Cookie Balls
Step 1: Prepare Your Baking Sheet
Cover a large rimmed baking sheet with wax paper. This will help prevent sticking when you place your cookie balls on it.
Step 2: Mix Your Ingredients
In a mixing bowl, combine the softened cream cheese and finely crushed OREO Cookies. Use your mixer on medium speed until well blended.
Step 3: Shape the Cookie Balls
Shape the mixture into 1-inch balls. Once formed, roll each ball in powdered sugar, ensuring they are evenly coated on all sides. Place them in a single layer on the prepared baking sheet.
Step 4: Chill Before Serving
Refrigerate the cookie balls for about one hour or until firm. Keep them refrigerated until you’re ready to serve these delicious Snowball Oreo Cookie Balls! Enjoy!
How to Serve Snowball Oreo Cookie Balls
Serving Snowball Oreo Cookie Balls is easy and fun. These treats are perfect for any occasion, from holiday gatherings to casual get-togethers. Here are some serving suggestions to make your presentation even more delightful.
Individual Treats
- Use small dessert cups to serve each cookie ball individually. This adds a touch of elegance and makes it easy for guests to grab one.
Platter Display
- Arrange the cookie balls on a decorative platter. You can sprinkle some extra crushed OREO cookies around them for a visually appealing presentation.
Gift Jars
- Place the Snowball Oreo Cookie Balls in mason jars tied with ribbons. This makes a great homemade gift for friends and family during the holidays.
Dessert Table Feature
- Include the cookie balls as part of a larger dessert table. They pair well with other sweets and add variety to your spread.
Themed Decoration
- Decorate the serving area according to a theme, such as winter wonderland or holiday cheer, to enhance the festive atmosphere.
How to Perfect Snowball Oreo Cookie Balls
To ensure your Snowball Oreo Cookie Balls come out perfectly every time, follow these helpful tips.
- Use softened cream cheese: Let the cream cheese sit at room temperature before mixing. This makes blending easier and results in a smoother texture.
- Crush cookies finely: For the best consistency, crush the OREO cookies into fine crumbs. Large pieces may affect the shape of your cookie balls.
- Chill properly: Make sure to refrigerate the cookie balls for at least an hour before serving. This helps them firm up and makes them easier to handle.
- Roll in powdered sugar: Rolling each ball in powdered sugar not only adds sweetness but also prevents sticking and enhances appearance.
Best Side Dishes for Snowball Oreo Cookie Balls
Pairing side dishes with your Snowball Oreo Cookie Balls can enhance your dessert experience. Here are some delicious options that complement these sweet treats perfectly.
- Fruit Skewers: Fresh fruit skewers add a refreshing contrast. Combine strawberries, pineapple, and grapes for a colorful display.
- Mini Cheesecakes: Individual mini cheesecakes provide a rich counterpart to the lightness of the cookie balls.
- Chocolate Fondue: A warm chocolate fondue station invites guests to dip fruits or cookies, creating an interactive dessert experience.
- Coffee or Tea: Serving coffee or tea alongside your dessert provides a warm beverage option that balances sweetness nicely.
- Ice Cream Sundae Bar: Set up an ice cream bar with various toppings that guests can customize alongside their cookie balls for added fun.
- Brownie Bites: Rich brownie bites offer another chocolatey treat that pairs well with the flavors of the OREO cookie balls.
Common Mistakes to Avoid
Making Snowball Oreo Cookie Balls can be a fun and rewarding experience. However, there are a few common mistakes that can affect the outcome of your delicious treat.
- Using Cold Cream Cheese: If your cream cheese is cold, it will not mix well with the cookie crumbs. Always let it soften at room temperature for better blending.
- Not Crushing Cookies Properly: Unevenly crushed cookies can lead to inconsistent texture. Use a food processor or a rolling pin to crush the OREO Cookies finely.
- Skipping Refrigeration: Failing to refrigerate the cookie balls before serving can result in them being too soft. Make sure to chill them for at least one hour until firm.
- Over-Rolling in Sugar: Rolling the balls too heavily in powdered sugar can create an overly sweet treat. A light coating is sufficient for a balanced flavor.
- Ignoring Storage Instructions: Not following proper storage guidelines may lead to soggy or stale cookie balls. Store them correctly in airtight containers to maintain freshness.
Storage & Reheating Instructions
Refrigerator Storage
- Store your Snowball Oreo Cookie Balls in an airtight container.
- They will last up to 1 week in the refrigerator.
Freezing Snowball Oreo Cookie Balls
- Place cookie balls on a baking sheet in a single layer and freeze until solid.
- Transfer to an airtight container or freezer bag for up to 3 months.
Reheating Snowball Oreo Cookie Balls
- Oven: Preheat your oven to 350°F (175°C). Place cookie balls on a baking sheet for about 5 minutes until slightly warm.
- Microwave: Heat one ball at a time on high for about 10-15 seconds. Be careful not to overheat, as they can become too soft.
- Stovetop: Use a skillet over low heat, warming each ball for about 1-2 minutes while turning occasionally.
Frequently Asked Questions
Here are some common questions people have about making Snowball Oreo Cookie Balls.
Can I use low-fat cream cheese?
Yes, you can use low-fat cream cheese, but the texture and taste may differ slightly from using regular cream cheese.
How do I customize Snowball Oreo Cookie Balls?
You can customize these treats by adding different toppings like chopped nuts, sprinkles, or drizzling with melted chocolate after rolling them in powdered sugar.
How many servings does this recipe make?
This recipe yields approximately 15 cookie balls, making it great for sharing during holidays or gatherings.
Can I make these ahead of time?
Absolutely! You can prepare these cookie balls up to two days in advance and store them in the refrigerator until ready to serve.
Final Thoughts
Snowball Oreo Cookie Balls are not just simple to make; they’re also versatile and perfect for any occasion. You can customize them with various toppings or flavors, making them suitable year-round. Give this delightful no-bake dessert a try!
Did You Enjoy Making This Recipe? Please rate this recipe with ⭐⭐⭐⭐⭐ or leave a comment.
📖 Recipe Card
Print
Snowball Oreo Cookie Balls
- Total Time: 0 hours
- Yield: Approximately 15 servings 1x
Description
Indulge your sweet tooth with these delightful Snowball Oreo Cookie Balls! These no-bake treats combine the rich, creamy flavor of cream cheese with the classic taste of OREO cookies. Perfect for any occasion, from holiday gatherings to casual get-togethers, these cookie balls require minimal effort and just three simple ingredients. With a quick prep time of only 20 minutes, they are an ideal last-minute dessert that everyone will love. Roll them in powdered sugar for a snowy finish, and enjoy a bite-sized explosion of flavor that is sure to impress your guests!
Ingredients
- 1 8 oz. brick cream cheese (softened)
- 36 OREO Cookies (finely crushed)
- 1/2 cup powdered sugar
Instructions
- Prepare your baking sheet by covering it with wax paper.
- In a mixing bowl, blend softened cream cheese and finely crushed OREO cookies using a mixer on medium speed until smooth.
- Shape the mixture into 1-inch balls and roll each in powdered sugar to coat evenly.
- Place the cookie balls on the prepared baking sheet and refrigerate for about one hour or until firm before serving.
- Prep Time: 20 minutes
- Cook Time: N/A
- Category: Dessert
- Method: No-bake
- Cuisine: American
Nutrition
- Serving Size: 1 cookie ball (30g)
- Calories: 140
- Sugar: 11g
- Sodium: 50mg
- Fat: 7g
- Saturated Fat: 4g
- Unsaturated Fat: 2g
- Trans Fat: 0g
- Carbohydrates: 18g
- Fiber: 0g
- Protein: 1g
- Cholesterol: 15mg