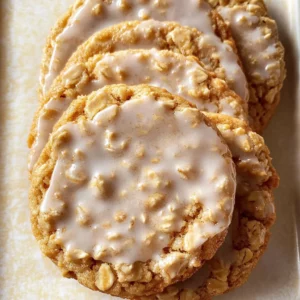
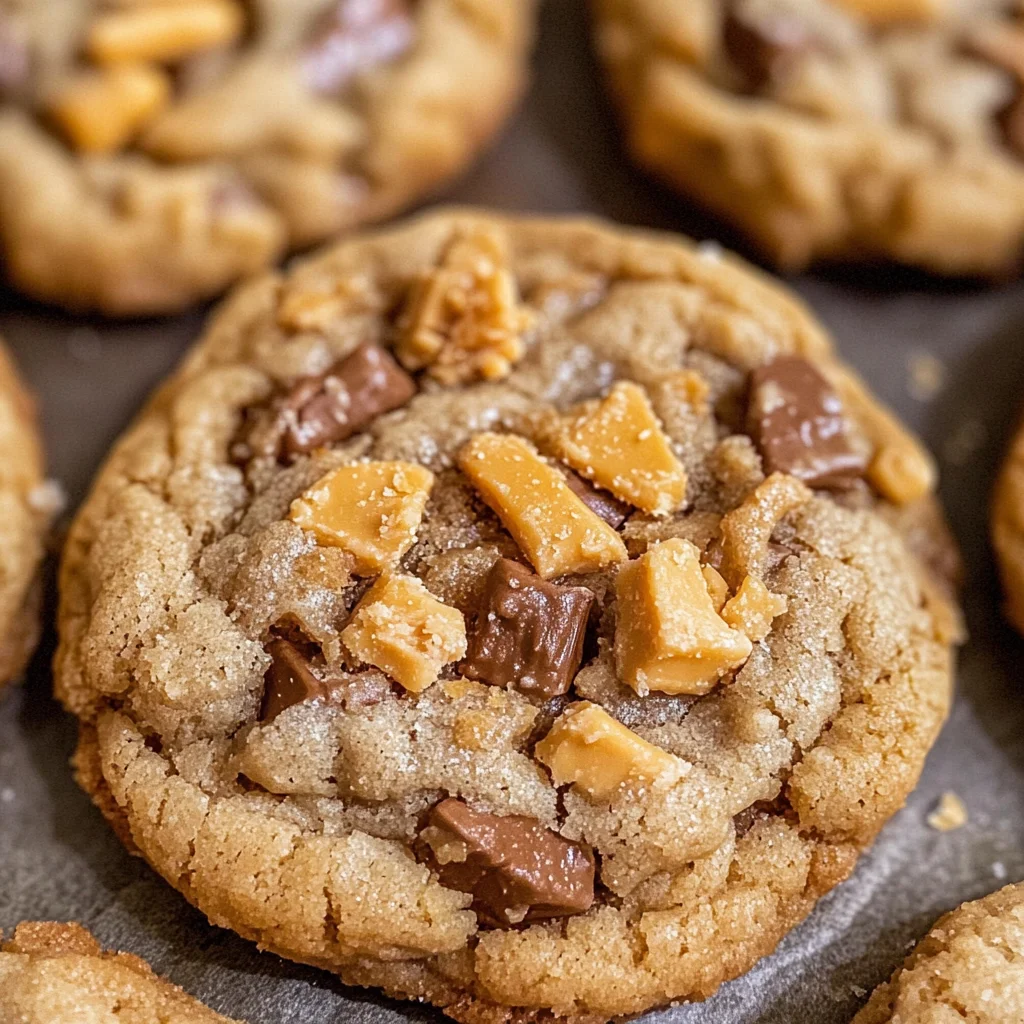
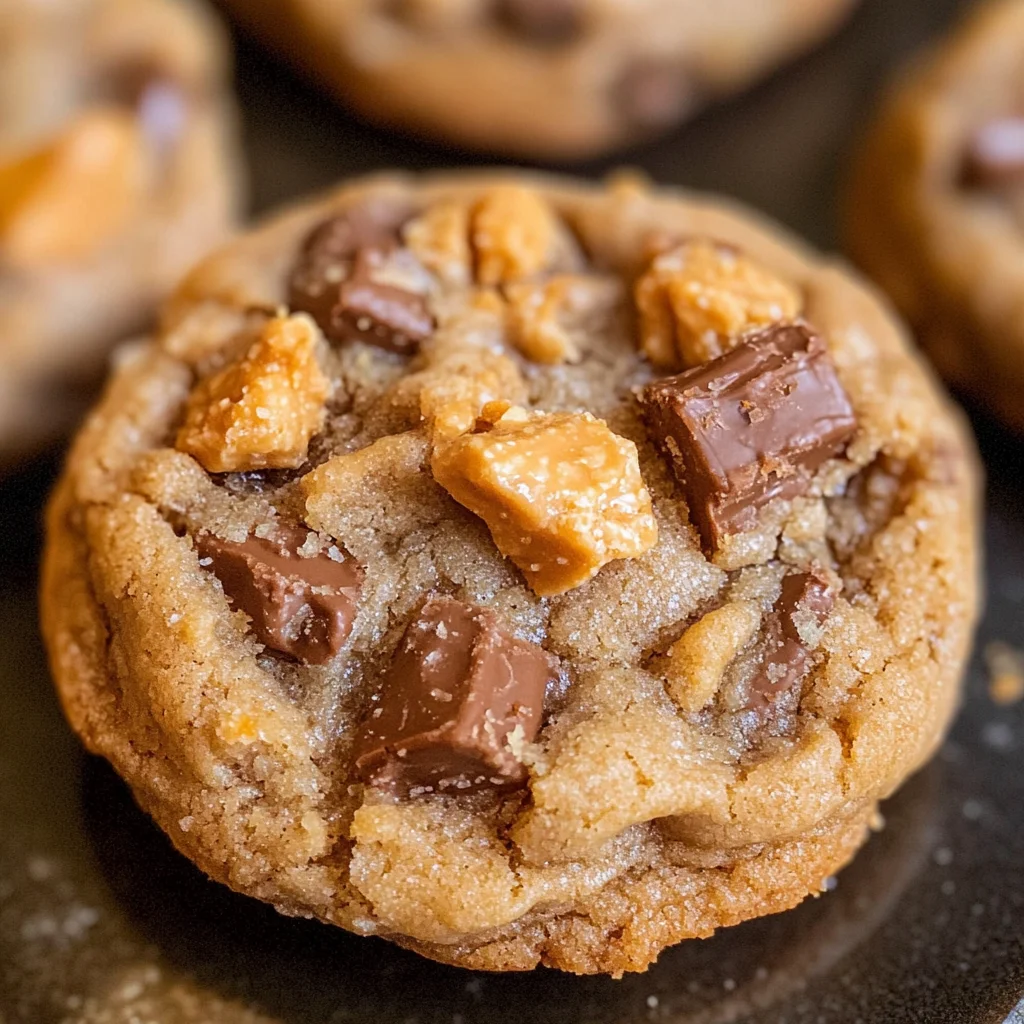
These Peanut Butter Butterfinger Cookies are truly a game-changer! The classic peanut butter cookie gets an irresistible twist with the addition of chopped Butterfinger candy. This combination creates a soft, thick cookie that is enhanced by the delightful crunch and flavor of Butterfinger. Perfect for parties, family gatherings, or just as a sweet treat for yourself, these cookies are sure to impress.
Jump to:
- Why You’ll Love This Recipe
- Tools and Preparation
- Essential Tools and Equipment
- Importance of Each Tool
- Ingredients
- How to Make Peanut Butter Butterfinger Cookies
- Step 1: Cream the Butters and Sugars
- Step 2: Add Sugars
- Step 3: Incorporate Peanut Butter
- Step 4: Mix in Egg and Vanilla
- Step 5: Combine Dry Ingredients
- Step 6: Form Dough
- Step 7: Add Butterfingers
- Step 8: Chill Dough
- Step 9: Preheat Oven
- Step 10: Shape Cookies
- Step 11: Arrange on Baking Sheet
- Step 12: Bake Cookies
- Step 13: Flatten If Necessary
- Step 14: Cool Cookies
- Step 15: Enjoy at Room Temperature
- Step 16: Store Leftovers
- Step 17: Freezing Options
- How to Serve Peanut Butter Butterfinger Cookies
- With a Glass of Milk
- Ice Cream Sandwiches
- Drizzled with Chocolate
- Cookie Platter
- Topped with Whipped Cream
- With Fresh Fruit
- How to Perfect Peanut Butter Butterfinger Cookies
- Best Side Dishes for Peanut Butter Butterfinger Cookies
- Common Mistakes to Avoid
- Refrigerator Storage
- Freezing Peanut Butter Butterfinger Cookies
- Reheating Peanut Butter Butterfinger Cookies
- Frequently Asked Questions
- What makes Peanut Butter Butterfinger Cookies special?
- Can I use different types of chocolate bars?
- How do I prevent my cookies from spreading too much?
- Can I customize this recipe?
- Final Thoughts
- 📖 Recipe Card
Why You’ll Love This Recipe
- Irresistible Flavor – The rich taste of peanut butter paired with the sweetness of Butterfinger creates a mouthwatering experience.
- Easy to Make – With simple ingredients and straightforward steps, these cookies can be made in no time.
- Perfect for Any Occasion – Whether it’s a birthday party or a cozy night in, these cookies fit right in.
- Freezes Well – Prepare a batch ahead of time and freeze it for fresh cookies any day of the week!
- Mouthwatering Texture – Enjoy the soft base cookie combined with the crunchy bits of Butterfinger for an unforgettable bite.
Tools and Preparation
Before diving into this delicious recipe, gather your tools. Having everything ready will streamline your baking process.
Essential Tools and Equipment
- Stand mixer or large mixing bowl
- Measuring cups and spoons
- Baking sheets
- Parchment paper or silicone baking mat
- Cookie scoop (optional)
- Cooling rack
Importance of Each Tool
- Stand mixer or large mixing bowl – Essential for thoroughly mixing ingredients to achieve the perfect dough consistency.
- Parchment paper or silicone baking mat – Prevents sticking and ensures even baking for your cookies.
- Cookie scoop – Helps create uniform cookie sizes for consistent baking results.
Ingredients
These Peanut Butter Butterfinger Cookies require some common ingredients that you might already have at home.
- 3/4 cup butter (softened (1 and 1/2 sticks))
- 1/2 cup granulated sugar
- 1/2 cup brown sugar (packed)
- 1 cup peanut butter (don’t use natural pb)
- 1 large egg
- 1 & 1/2 teaspoons vanilla
- 1 & 1/2 cups all-purpose flour (spooned and leveled)
- 1/2 teaspoon baking soda
- 1/2 teaspoon baking powder
- 1/4 teaspoon kosher salt
- 16 ounces butterfinger (chopped, see note)
How to Make Peanut Butter Butterfinger Cookies
Step 1: Cream the Butters and Sugars
In a large bowl or stand mixer, beat the softened butter until smooth and creamy. Scrape down the sides of the bowl as needed.
Step 2: Add Sugars
Add granulated sugar and packed brown sugar. Beat well for about 2 minutes until fluffy, ensuring there are no chunks of butter left.
Step 3: Incorporate Peanut Butter
Add peanut butter and mix until fully combined.
Step 4: Mix in Egg and Vanilla
Add one egg and vanilla extract. Beat until combined again, scraping down the sides occasionally.
Step 5: Combine Dry Ingredients
Spoon flour into measuring cups without packing it down. Add to the mixture along with baking soda, baking powder, and kosher salt on top of the flour. Stir gently with a teaspoon to combine dry ingredients slightly.
Step 6: Form Dough
Turn on the mixer to combine all ingredients until just mixed. Stop before over-mixing; some flour should still be visible.
Step 7: Add Butterfingers
Fold in chopped Butterfingers gently until barely incorporated into the dough.
Step 8: Chill Dough
Cover the bowl with plastic wrap and chill in the fridge for at least 15 minutes up to an hour (or longer if desired).
Step 9: Preheat Oven
Preheat your oven to 350 degrees F. Line two baking sheets with parchment paper or silicone mats.
Step 10: Shape Cookies
Use your hands or a cookie scoop to form dough into balls about 2 inches wide.
Step 11: Arrange on Baking Sheet
Place cookie balls on prepared baking sheets, leaving space between them to spread during baking.
Step 12: Bake Cookies
Bake in preheated oven for about 10 minutes until edges are set but centers are still soft.
Step 13: Flatten If Necessary
If cookies haven’t spread enough while baking, gently press them down with a spatula right after removing from oven.
Step 14: Cool Cookies
Let cookies sit on pan for about five minutes before transferring them to a wire rack to cool completely.
Step 15: Enjoy at Room Temperature
While warm cookies can be tempting, allow them to cool closer to room temperature for optimal texture before enjoying!
Step 16: Store Leftovers
This recipe yields approximately 25 cookies. Store any leftovers in a tightly sealed container for up to three days.
Step 17: Freezing Options
For longer storage, freeze cookie dough balls in a ziplock bag for up to three months or freeze baked cookies for up to four weeks. Thaw at room temperature before enjoying!
With this easy guide, you’re well on your way to enjoying delicious Peanut Butter Butterfinger Cookies that everyone will love!
How to Serve Peanut Butter Butterfinger Cookies
These Peanut Butter Butterfinger Cookies are a delightful treat that can be enjoyed in various ways. Whether you’re hosting a gathering or simply indulging at home, here are some serving suggestions to elevate your cookie experience.
With a Glass of Milk
- Pair each cookie with a cold glass of milk for a classic combination. The creaminess of the milk complements the rich peanut butter flavor.
Ice Cream Sandwiches
- Use two cookies to create ice cream sandwiches. Choose your favorite flavor of ice cream, like vanilla or chocolate, for an extra indulgent dessert.
Drizzled with Chocolate
- Melt some chocolate and drizzle it over the cookies. This adds an elegant touch and enhances the flavors of both the peanut butter and Butterfinger bits.
Cookie Platter
- Arrange your Peanut Butter Butterfinger Cookies on a platter alongside other cookies. This makes for a delicious dessert table at parties or gatherings.
Topped with Whipped Cream
- Serve these cookies warm and top them with whipped cream for an upscale dessert option. It adds a light and airy texture that pairs wonderfully with the dense cookie.
With Fresh Fruit
- Enjoy your cookies alongside fresh fruit like strawberries or bananas. The sweetness from the fruit balances out the rich flavors of the cookie.
How to Perfect Peanut Butter Butterfinger Cookies
To achieve the best results with your Peanut Butter Butterfinger Cookies, consider these helpful tips for perfecting your baking technique.
- Use Room Temperature Ingredients: Ensure butter and egg are at room temperature for better mixing, which leads to a smoother dough.
- Don’t Overmix Dough: Mix just until ingredients are combined. Overmixing can lead to tough cookies instead of soft, chewy ones.
- Chill the Dough: For thicker cookies, chill the dough before baking. This helps maintain their shape and enhances flavor.
- Measure Flour Correctly: Spoon flour into measuring cups instead of scooping directly. This prevents packing and ensures accurate measurements.
- Use Quality Peanut Butter: Opt for creamy peanut butter without added oils or sugar for the best flavor in your cookies.
- Cool Before Serving: Allow cookies to cool completely before serving. This helps them set properly and improves their texture.
Best Side Dishes for Peanut Butter Butterfinger Cookies
While these cookies are delicious on their own, pairing them with some delectable side dishes can enhance your snacking experience. Here are some great options to consider:
- Fruit Salad: A refreshing mix of seasonal fruits provides a light contrast to the richness of the cookies.
- Cheese Platter: Include sharp cheeses like cheddar or gouda on a platter; they complement sweet treats beautifully.
- Chocolate Fondue: Set up a chocolate fondue station where guests can dip cookie pieces into melted chocolate for extra indulgence.
- Yogurt Parfait: Layer yogurt with granola and fresh berries; this can be served as a healthy counterpoint to the sweets.
- Coffee or Tea: Brewed coffee or various teas provide warmth and enhance flavors, making them great companions to these cookies.
- Nut Mix: A simple bowl of mixed nuts offers salty crunchiness that pairs well with sweet flavors, adding depth to your snack selection.
- Mini Muffins: Offer mini muffins in complementary flavors like banana or chocolate chip for additional variety in taste.
- Ice Cream Floats: Create ice cream floats using soda and vanilla ice cream; they add fun and sweetness that pairs nicely with cookies.
Common Mistakes to Avoid
Making Peanut Butter Butterfinger Cookies can be simple, but there are a few common mistakes that can affect your results. Here are some tips to ensure your cookies turn out perfect every time.
- Using natural peanut butter: Natural peanut butter can alter the texture of the cookies. Stick with regular peanut butter for the best results.
- Overmixing the dough: Mixing too much can lead to tough cookies. Mix just until combined to keep them soft and chewy.
- Not chilling the dough: Skipping the chilling step can cause cookies to spread too much while baking. Chill for at least 15 minutes for thicker cookies.
- Ignoring baking times: Every oven is different; check your cookies a minute or two early to avoid overbaking. They should be set at the edges but still soft in the center.
- Not measuring flour correctly: Use the spoon-and-level method to measure flour accurately. Too much flour can make cookies dry.
Refrigerator Storage
- Store your Peanut Butter Butterfinger Cookies in an airtight container in the refrigerator.
- They will stay fresh for up to 3 days.
Freezing Peanut Butter Butterfinger Cookies
- Freeze cookie dough balls in a ziplock bag for up to 3 months.
- Baked cookies can be frozen as well; store them in a sealed container for up to 4 weeks.
Reheating Peanut Butter Butterfinger Cookies
- Oven: Preheat your oven to 350°F and warm cookies for about 5 minutes.
- Microwave: Heat individual cookies on a microwave-safe plate for about 10-15 seconds.
- Stovetop: Use a skillet over low heat, covering it with a lid, and warm for about 1-2 minutes.
Frequently Asked Questions
What makes Peanut Butter Butterfinger Cookies special?
These cookies combine classic peanut butter flavors with crunchy bits of Butterfinger candy, creating a delightful treat that’s both soft and crispy.
Can I use different types of chocolate bars?
Absolutely! You can substitute Butterfinger with other chocolate bars like Snickers or Reese’s for varied flavors.
How do I prevent my cookies from spreading too much?
Chilling the dough before baking helps keep these Peanut Butter Butterfinger Cookies thick. Make sure you chill them for at least 15 minutes.
Can I customize this recipe?
Yes! Feel free to add nuts, change the candy type, or adjust sugar levels according to your taste preferences.
Final Thoughts
Peanut Butter Butterfinger Cookies are a delicious twist on traditional peanut butter cookies. Their unique combination of flavors makes them perfect for any occasion. Experiment with different mix-ins or toppings, and enjoy customizing this versatile recipe!
Did You Enjoy Making This Recipe? Please rate this recipe with ⭐⭐⭐⭐⭐ or leave a comment.
📖 Recipe Card
Print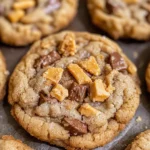
Peanut Butter Butterfinger Cookies
- Total Time: 30 minutes
- Yield: Approximately 25 cookies 1x
Description
Indulge in these Peanut Butter Butterfinger Cookies, a delightful twist on the classic peanut butter cookie. Soft and thick, each bite is bursting with the rich flavor of peanut butter and the irresistible crunch of Butterfinger candy. Perfect for any gathering or as a sweet treat for yourself, these cookies are sure to impress family and friends alike. Easy to whip up with simple ingredients, they freeze well and can be enjoyed any day of the week. Get ready to bake a batch that will have everyone coming back for more!
Ingredients
- 3/4 cup softened butter
- 1/2 cup granulated sugar
- 1/2 cup packed brown sugar
- 1 cup creamy peanut butter (not natural)
- 1 large egg
- 1 & 1/2 teaspoons vanilla extract
- 1 & 1/2 cups all-purpose flour
- 1/2 teaspoon baking soda
- 1/2 teaspoon baking powder
- 1/4 teaspoon kosher salt
- 16 ounces chopped Butterfinger candy
Instructions
- Preheat your oven to 350°F and line baking sheets with parchment paper.
- In a large bowl or stand mixer, cream the softened butter until smooth.
- Add granulated and brown sugars; beat until fluffy for about 2 minutes.
- Mix in peanut butter until fully combined.
- Incorporate egg and vanilla extract, mixing until blended.
- Gradually add flour, baking soda, baking powder, and salt; mix until just combined.
- Gently fold in chopped Butterfingers.
- Chill the dough for at least 15 minutes.
- Form dough into balls (about 2 inches wide) and place on prepared sheets.
- Bake for about 10 minutes, allowing edges to set while centers remain soft.
- Cool on the pan for five minutes before transferring to a wire rack.
- Prep Time: 20 minutes
- Cook Time: 10 minutes
- Category: Dessert
- Method: Baking
- Cuisine: American
Nutrition
- Serving Size: 1 cookie (30g)
- Calories: 150
- Sugar: 9g
- Sodium: 90mg
- Fat: 8g
- Saturated Fat: 3g
- Unsaturated Fat: 5g
- Trans Fat: 0g
- Carbohydrates: 19g
- Fiber: <1g
- Protein: 3g
- Cholesterol: 15mg