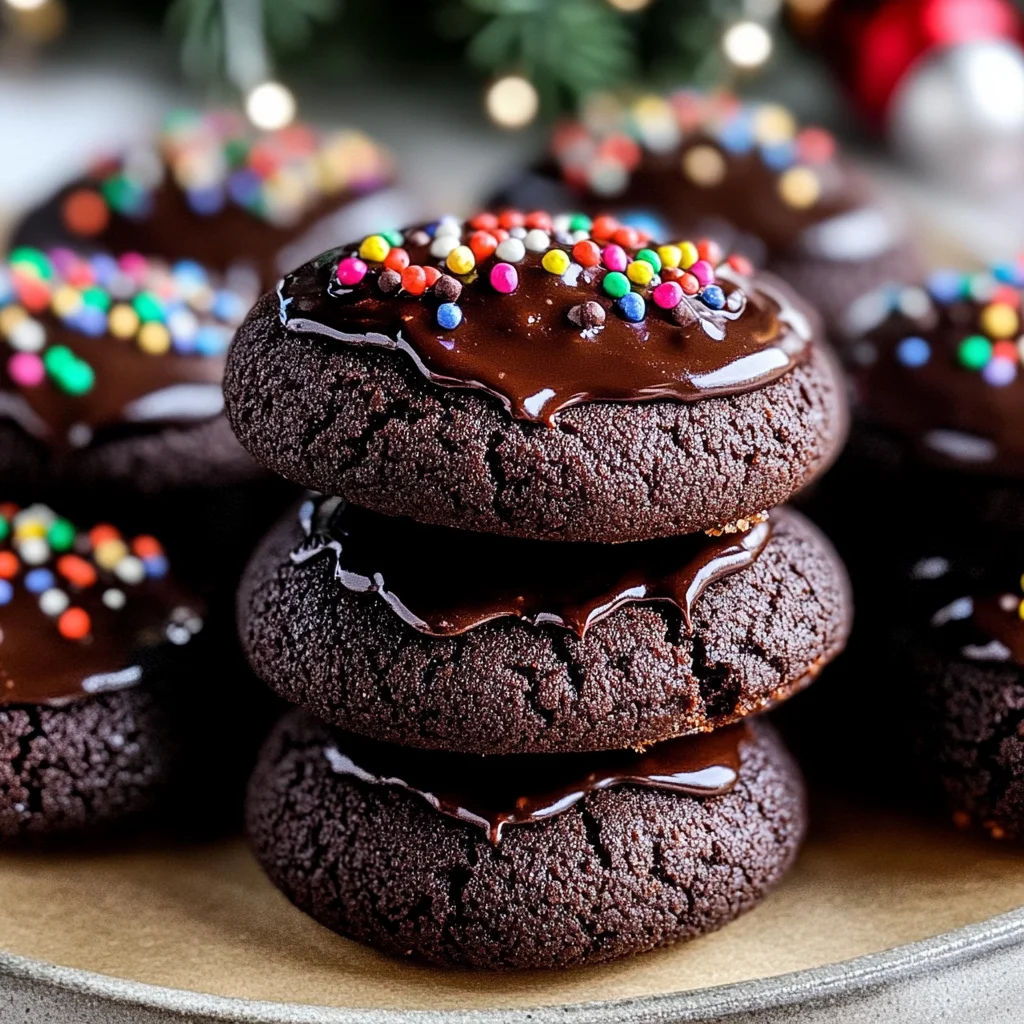
Chocolate thumbprint cookies are a delightful treat that brings together rich and chewy dark chocolate with a luscious chocolate ganache center. These cookies are perfect for any occasion, whether you’re hosting a dinner party or simply indulging yourself at home. Their unique texture and bold flavor make them stand out, ensuring they are a crowd-pleaser and a delightful dessert option.

Jump to:
- Why You’ll Love This Recipe
- Tools and Preparation
- Essential Tools and Equipment
- Importance of Each Tool
- Ingredients
- How to Make Chocolate Thumbprint Cookies
- Step 1: Preheat the Oven
- Step 2: Prepare Your Baking Sheet
- Step 3: Mix Dry Ingredients
- Step 4: Cream Butter and Sugars
- Step 5: Add Egg Yolks and Vanilla
- Step 6: Combine Wet and Dry Mixtures
- Step 7: Form Cookies
- Step 8: Bake
- Step 9: Make Ganache Filling
- Step 10: Garnish
- How to Serve Chocolate Thumbprint Cookies
- With a Glass of Milk
- On a Dessert Platter
- As Ice Cream Sandwiches
- With Fresh Berries
- Drizzled with Caramel Sauce
- Paired with Coffee or Espresso
- How to Perfect Chocolate Thumbprint Cookies
- Best Side Dishes for Chocolate Thumbprint Cookies
- Common Mistakes to Avoid
- Storage & Reheating Instructions
- Refrigerator Storage
- Freezing Chocolate Thumbprint Cookies
- Reheating Chocolate Thumbprint Cookies
- Frequently Asked Questions
- What are Chocolate Thumbprint Cookies?
- How do I make Chocolate Thumbprint Cookies gluten-free?
- Can I customize my Chocolate Thumbprint Cookies?
- How long do Chocolate Thumbprint Cookies last?
- Why did my chocolate ganache become too hard?
- Final Thoughts
- 📖 Recipe Card
Why You’ll Love This Recipe
- Easy to Make: With simple ingredients and straightforward steps, these cookies can be whipped up even by novice bakers.
- Decadent Flavor: The combination of dark chocolate and creamy ganache creates an indulgent taste experience that chocolate lovers will adore.
- Versatile Treat: Perfect for holidays, parties, or just because, these cookies fit any occasion beautifully.
- Perfect for Sharing: With 34 cookies per batch, they are great for sharing with friends and family or for meal prepping sweet treats for the week.
- Customizable: Feel free to add nuts or different toppings to match your taste preferences.
Tools and Preparation
To create your chocolate thumbprint cookies, you’ll need a few essential tools that will make the process smoother. Having the right equipment can enhance your baking experience and ensure consistent results.
Essential Tools and Equipment
- Baking sheet
- Parchment paper
- Mixing bowls
- Electric mixer
- Cookie scoop
Importance of Each Tool
- Baking sheet: Ensures even baking and easy transfer of cookies from the oven.
- Parchment paper: Prevents sticking and makes cleanup a breeze.
- Electric mixer: Saves time and effort when creaming butter and sugar.
Ingredients
Chocolate thumbprint cookies are rich and chewy dark chocolate cookies with velvety smooth chocolate ganache centers.
Ingredients:
– 1 1/2 cups (188 g) all-purpose flour, spooned and leveled (see notes)
– 1/2 cup (40 g) cocoa powder (Dutch process)
– 1/2 tsp salt
– 1/2 tsp baking powder
– 3/4 cup (168 g) unsalted butter, softened
– 3/4 cup (165 g) light brown sugar, packed
– 1/4 cup (50 g) granulated white sugar
– 2 egg yolks, at room temperature
– 1 1/2 tsp vanilla bean paste or extract
– 1 cup (200 g) semi-sweet chocolate chips
– 1/2 cup (120 ml) heavy whipping cream
– nonpareils for sprinkling on top (optional)
How to Make Chocolate Thumbprint Cookies
Step 1: Preheat the Oven
Preheat your oven to 350°F (175°C). This ensures that your chocolate thumbprint cookies start baking at the right temperature for optimal rise and texture.
Step 2: Prepare Your Baking Sheet
Line a baking sheet with parchment paper. This prevents sticking and allows for easy removal of the baked cookies once they’re done.
Step 3: Mix Dry Ingredients
In a mixing bowl, combine:
All-purpose flour
Cocoa powder
Salt
Baking powder
Whisk together until well combined. Set aside.
Step 4: Cream Butter and Sugars
In another bowl, use an electric mixer to cream together:
Unsalted butter
Add both light brown sugar and granulated white sugar. Beat until the mixture is light and fluffy.
Step 5: Add Egg Yolks and Vanilla
Mix in the egg yolks one at a time along with the vanilla bean paste or extract. Ensure everything is thoroughly blended before proceeding to the next step.
Step 6: Combine Wet and Dry Mixtures
Gradually add the dry ingredients into the wet mixture, stirring until just combined. The dough should be thick but manageable.
Step 7: Form Cookies
Using a cookie scoop, drop rounded tablespoonfuls of dough onto the prepared baking sheet. Make an indentation in each cookie using your thumb to create space for the ganache filling.
Step 8: Bake
Bake in preheated oven for about 10 minutes or until set. Remove from oven and let cool while preparing the ganache.
Step 9: Make Ganache Filling
In a small saucepan over medium heat, combine heavy whipping cream with semi-sweet chocolate chips. Stir until smooth. Fill each cookie’s indentation with ganache while still warm.
Step 10: Garnish
Sprinkle nonpareils on top of each filled cookie if desired. Allow ganache to set before serving or storing them in an airtight container.
How to Serve Chocolate Thumbprint Cookies
Chocolate thumbprint cookies are a delightful treat that can be enjoyed in various ways. Whether you’re hosting a gathering or enjoying them at home, here are some creative serving suggestions to enhance your experience.
With a Glass of Milk
- A classic pairing that complements the rich chocolate flavor and balances sweetness.
On a Dessert Platter
- Arrange cookies on a beautiful platter for an eye-catching centerpiece at parties or gatherings.
As Ice Cream Sandwiches
- Sandwich your favorite ice cream between two chocolate thumbprint cookies for an indulgent dessert.
With Fresh Berries
- Serve alongside strawberries or raspberries to add a refreshing contrast to the chocolate richness.
Drizzled with Caramel Sauce
- A drizzle of warm caramel over the cookies elevates their sweetness and adds texture.
Paired with Coffee or Espresso
- Enjoy these cookies with a cup of coffee or espresso for a delightful afternoon treat.
How to Perfect Chocolate Thumbprint Cookies
To achieve the best chocolate thumbprint cookies, consider these helpful tips that ensure delicious results every time.
- Chill the Dough: Refrigerate the dough for at least 30 minutes before baking. This helps maintain their shape and prevents spreading.
- Use High-Quality Chocolate: Opt for premium semi-sweet chocolate chips for the ganache. It makes a significant difference in flavor.
- Measure Ingredients Accurately: Use a kitchen scale for precise measurements, especially for flour and cocoa powder, to avoid dense cookies.
- Avoid Overbaking: Keep an eye on the baking time. Cookies should be soft in the center when you take them out of the oven.
- Let Ganache Set Properly: Allow the ganache to cool completely before using it as filling, ensuring it reaches the right consistency.
- Experiment with Toppings: Try different toppings like chopped nuts or sea salt flakes for added texture and flavor.
Best Side Dishes for Chocolate Thumbprint Cookies
Chocolate thumbprint cookies pair well with various side dishes that complement their rich flavor. Here are some excellent options to consider when serving these treats.
- Vanilla Ice Cream: A scoop of creamy vanilla ice cream perfectly balances the intense chocolate flavors.
- Fruit Salad: A light fruit salad adds freshness and contrasts nicely with the sweetness of the cookies.
- Chocolate Mousse: For true chocolate lovers, serving chocolate mousse creates a decadent dessert experience.
- Cheesecake Bites: Mini cheesecake bites offer creamy richness that pairs beautifully with these cookies.
- Whipped Cream: Light and airy whipped cream can be dolloped on top of each cookie for added indulgence.
- Coffee Cake: A slice of coffee cake provides a delightful brunch option alongside these tasty treats.
- Nut Mix: A mix of salted nuts adds crunch and balances out sweetness when enjoyed with cookies.
- Chocolate Fondue: Dip cookie halves into warm chocolate fondue for an interactive dessert experience that’s fun and delicious.
Common Mistakes to Avoid
Making chocolate thumbprint cookies can be a delightful experience, but there are common pitfalls to watch out for.
- Using cold ingredients: Always ensure your butter and eggs are at room temperature. This helps create a smooth dough and better texture in your cookies.
- Not measuring flour accurately: Spoon and level your flour instead of scooping directly from the bag. This prevents adding too much flour, which can make cookies dry.
- Skipping the chilling time: If your dough is too warm, the cookies might spread too much during baking. Chill the dough for at least 30 minutes for perfect shapes.
- Overbaking: Keep an eye on the baking time. Cookies should look soft when you take them out of the oven as they continue to firm up while cooling.
- Neglecting ganache preparation: Allow the ganache to cool slightly before filling the cookies. This ensures it doesn’t run off and maintains its silky texture.
Storage & Reheating Instructions
Refrigerator Storage
- Store chocolate thumbprint cookies in an airtight container.
- They will last up to 5 days in the refrigerator.
Freezing Chocolate Thumbprint Cookies
- Place cooled cookies in a single layer on a baking sheet.
- Once frozen, transfer them to an airtight container or freezer bag.
- They can be stored for up to 3 months in the freezer.
Reheating Chocolate Thumbprint Cookies
- Oven: Preheat to 350°F (175°C) and heat cookies for about 5-7 minutes for best results.
- Microwave: Heat one cookie at a time for about 10-15 seconds until warm, being careful not to overdo it.
- Stovetop: Place cookies in a skillet over low heat for a couple of minutes, flipping them gently.
Frequently Asked Questions
If you’re curious about chocolate thumbprint cookies, here are some commonly asked questions.
What are Chocolate Thumbprint Cookies?
Chocolate thumbprint cookies are rich, dark chocolate treats with a soft center filled with smooth chocolate ganache. They offer a delightful combination of flavors and textures.
How do I make Chocolate Thumbprint Cookies gluten-free?
To make these cookies gluten-free, substitute all-purpose flour with a gluten-free blend that measures cup-for-cup like Bob’s Red Mill or King Arthur’s.
Can I customize my Chocolate Thumbprint Cookies?
Absolutely! You can add nuts, use different types of chocolate, or even incorporate spices like cinnamon for a unique twist.
How long do Chocolate Thumbprint Cookies last?
When stored properly, these cookies can last up to 5 days in the refrigerator or up to 3 months in the freezer.
Why did my chocolate ganache become too hard?
If your ganache is too hard, it may have cooled too much or had too much chocolate compared to cream. Adjust ratios or reheat gently if needed.
Final Thoughts
Chocolate thumbprint cookies are not only delicious but also versatile. You can customize them easily by changing fillings or toppings. Whether you enjoy them as a snack or share them at gatherings, these treats are sure to impress. Don’t hesitate to try this recipe!
Did You Enjoy Making This Recipe? Please rate this recipe with ⭐⭐⭐⭐⭐ or leave a comment.
📖 Recipe Card
Print
Chocolate Thumbprint Cookies
- Total Time: 30 minutes
- Yield: Approximately 34 cookies 1x
Description
Indulge in the ultimate chocolate experience with these irresistible Chocolate Thumbprint Cookies. Each cookie features a rich, chewy dark chocolate base and a velvety smooth chocolate ganache center that melts in your mouth. Perfect for any occasion—from festive gatherings to cozy nights at home—these cookies are sure to impress friends and family alike. With their delightful texture and decadent flavor, they are not only easy to make but also customizable to fit your taste preferences. Whether enjoyed alongside a cup of coffee or as part of a dessert platter, these ganache-filled treats will become your new favorite cookie.
Ingredients
- 1 1/2 cups all-purpose flour
- 1/2 cup cocoa powder (Dutch process)
- 1/2 tsp salt
- 1/2 tsp baking powder
- 3/4 cup unsalted butter (softened)
- 3/4 cup light brown sugar (packed)
- 1/4 cup granulated white sugar
- 2 egg yolks (at room temperature)
- 1 1/2 tsp vanilla bean paste or extract
- 1 cup semi-sweet chocolate chips
- 1/2 cup heavy whipping cream
- nonpareils for sprinkling on top (optional)
Instructions
- Preheat oven to 350°F (175°C) and line a baking sheet with parchment paper.
- In one bowl, mix flour, cocoa powder, salt, and baking powder. In another bowl, cream softened butter with sugars until fluffy. Add egg yolks and vanilla; mix well.
- Gradually combine dry ingredients with the wet mixture until just mixed.
- Scoop tablespoon-sized dough onto the baking sheet; make an indentation in each cookie.
- Bake for about 10 minutes until set. Cool slightly before filling with ganache made by heating cream with chocolate chips until smooth.
- Prep Time: 20 minutes
- Cook Time: 10 minutes
- Category: Dessert
- Method: Baking
- Cuisine: American
Nutrition
- Serving Size: 1 cookie (28g)
- Calories: 135
- Sugar: 8g
- Sodium: 75mg
- Fat: 8g
- Saturated Fat: 5g
- Unsaturated Fat: 2g
- Trans Fat: 0g
- Carbohydrates: 16g
- Fiber: 1g
- Protein: 2g
- Cholesterol: 22mg